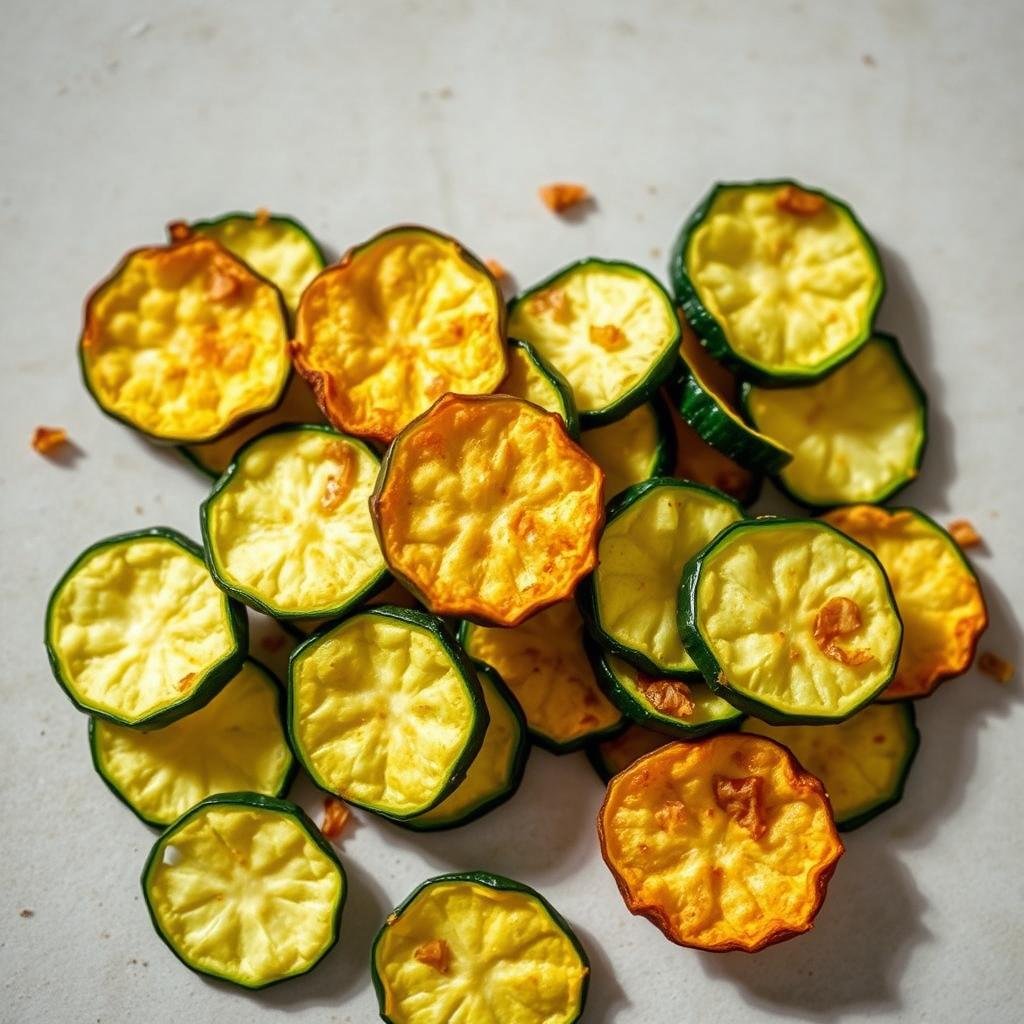
Are you looking for a delicious snack that satisfies your cravings without the guilt? Imagine biting into perfectly golden brown slices that crunch with every bite. This method transforms simple ingredients into something extraordinary.
You can create this fantastic treat in under 30 minutes using your countertop appliance. It beats using a conventional oven and avoids the mess of deep frying. You get all the flavor and texture with significantly less oil.
We’ll show you how to select the best produce and essential components. Proper preparation ensures your results turn out perfectly every time. This approach delivers a lighter version of your favorite snack.
Embrace this simple technique for a nutritious option that fits your lifestyle. These morsels are not only tasty but also packed with benefits. You’ll want to make them again and again!
Key Takeaways
- Create a satisfying snack in under 30 minutes using your countertop appliance
- Achieve perfect texture with significantly less oil than traditional frying methods
- Learn to select the best produce and ingredients for optimal results
- Enjoy a lighter version of your favorite treat without sacrificing flavor
- Master a simple technique that delivers consistent, delicious outcomes every time
- Discover a nutritious option that fits perfectly into your healthy lifestyle
- Avoid heating up your kitchen like a conventional oven would
Why You’ll Love These Air Fryer Zucchini Chips
Imagine reaching for a snack that delivers both incredible taste and nutritional benefits. These golden brown delights transform ordinary vegetables into something extraordinary. You get that satisfying crunch without compromising your health goals.
This preparation method creates a guilt-free treat that fits perfectly into your lifestyle. The countertop appliance works its magic with minimal effort on your part. You’ll discover a new favorite way to enjoy vegetables.
The Perfect Healthy Snack Solution
These morsels provide a satisfying alternative to traditional snack foods. They’re low in calories but packed with flavor and texture. You can enjoy them anytime without worrying about derailing your diet.
The customization options let you create exactly what you crave. Add simple seasonings or get creative with coatings. Parmesan cheese or ranch seasoning both work wonderfully.
You’ll appreciate how quickly everything comes together. From preparation to plate, the entire process takes mere minutes. It’s perfect for busy schedules when you need something wholesome fast.
Why Air Frying Beats Traditional Methods
This cooking technique circulates hot air around your food for even results. You achieve that desirable crispiness without submerging ingredients in oil. The outcome surpasses what you’d get from a conventional oven.
Your kitchen stays comfortable since the appliance doesn’t heat up the entire space. Traditional baking methods often make your cooking area uncomfortably warm. This approach keeps things cool while delivering superior texture.
The table below shows how this method compares to other cooking techniques:
| Method | Oil Required | Cooking Time | Kitchen Heat | Crispiness Level |
|---|---|---|---|---|
| Air Frying | 1 teaspoon | 10-15 minutes | Minimal | High |
| Oven Baking | 1 tablespoon | 20-25 minutes | Significant | Medium |
| Deep Frying | 4 cups | 5-7 minutes | Moderate | High |
You save both time and energy with this efficient approach. The short cooking period means you’re enjoying your snack faster. Everything comes out perfectly cooked with that ideal golden brown color.
Remember to arrange your slices in a single layer within the basket. This ensures proper air circulation for uniform results. You’ll achieve that perfect crunch every time you use this method.
Essential Ingredients for Perfect Zucchini Chips
Great snacks start with smart ingredient choices. Your selection directly impacts texture and taste. Picking the right components ensures your results turn out amazing every time.
Let’s explore the building blocks of fantastic homemade treats. These elements work together to create something special. You’ll love how simple yet effective these choices are.

Choosing the Right Zucchini
Select medium-sized produce for your preparation. They offer ideal firmness with minimal seeds. This prevents sogginess and promotes even cooking.
Avoid larger varieties that tend to be watery. Their higher moisture content affects crispiness. You want slices that hold their shape during cooking.
Freshness matters for the best outcome. Look for firm, vibrant green skin. Your finished product will thank you for this attention to detail.
Oil Options for Optimal Crispiness
Use oils with high smoke points for best results. Extra virgin olive oil and avocado oil work wonderfully. They promote that desirable golden finish without excess grease.
Apply just enough to coat your slices lightly. Too much oil prevents proper crisping. You want that perfect balance between texture and health benefits.
These choices withstand higher temperatures beautifully. They won’t break down during the cooking process. Your snacks maintain their nutritional value while achieving fantastic texture.
Seasoning Variations to Try
Experiment with different flavor combinations. Sea salt and black pepper create a classic taste. For something bolder, try grated Parmesan or ranch seasoning.
Garlic powder adds wonderful aromatic notes. Consider breaded versions using panko and almond flour. An egg wash helps the coating adhere perfectly.
Don’t overlook simple additions like apple cider vinegar. It provides a delightful tangy twist. Your creations will keep everyone coming back for more.
“The right seasoning transforms good snacks into extraordinary experiences. It’s all about balancing flavors to complement the natural taste.”
Remember that basic components form your foundation. Salt and oil are essential starting points. From there, your creativity can truly shine through.
Each variation offers its own unique appeal. You might discover new family favorites. The possibilities are limited only by your imagination.
Must-Have Kitchen Tools
Professional chefs know that quality tools make all the difference in kitchen success. Your equipment choices directly impact your final results. The right implements transform preparation from tedious to effortless.
Investing in proper gear ensures consistent, excellent outcomes every time. You’ll achieve that perfect texture more reliably. These tools become valuable allies in your culinary adventures.
Why a Mandoline Slicer Makes All the Difference
A mandoline ensures uniformly thin pieces for even cooking. Manual slicing often creates inconsistent thickness. This leads to uneven results where some burn while others remain soft.
You achieve perfect golden brown perfection throughout your batch. The device handles the tedious work quickly and efficiently. Your preparation time drops significantly with this handy tool.
Safety features on modern models protect your fingers during use. You get professional results without professional risks. This investment pays for itself in consistent outcomes.
Choosing the Right Air Fryer for the Job
Your appliance needs adequate space for proper air circulation. A spacious basket accommodates a single layer of your prepared slices. This prevents overcrowding that leads to steaming instead of crisping.
Recommended models like Instant Pot Omni Plus deliver outstanding performance. GoWISE USA units also provide excellent results for this recipe. These brands offer reliable temperature control and even heating.
Consider capacity based on your household size and needs. Larger families benefit from bigger baskets. Smaller units work perfectly for individual portions or couples.
The right equipment makes your cooking experience more enjoyable. You’ll want to create this delicious snack more often. Quality tools turn good recipes into great results consistently.
Step-by-Step Preparation Guide
Mastering the art of perfect vegetable snacks begins with proper preparation techniques. Your attention to detail during these initial stages determines the final outcome. Follow these essential steps to create exceptional results every time.

Slicing Techniques for Even Cooking
Begin by creating uniform pieces using either a mandoline slicer or sharp chef’s knife. Aim for consistent thickness between 1/8 and 1/4 inch. This precision ensures each piece receives equal heat exposure.
Your cutting method directly impacts the final texture. Uneven slices lead to inconsistent cooking results. Some pieces might burn while others remain undercooked.
Professional kitchens rely on mandoline tools for perfect uniformity. Home cooks can achieve similar results with careful knife work. The goal is identical thickness across all your prepared pieces.
Proper Drying Methods for Maximum Crisp
Moisture is the enemy of perfect texture in any vegetable preparation. Thoroughly pat each piece with paper towels or clean kitchen cloths. Remove as much surface liquid as possible before proceeding.
This critical step prevents steaming during the cooking process. Excess water creates sogginess instead of that desirable crunch. Your patience here pays dividends in the final product.
Some enthusiasts recommend salting pieces lightly before drying. This technique draws out additional moisture naturally. Rinse and pat dry again if using this approach.
Seasoning and Coating Your Zucchini
Combine your prepared pieces with chosen oil and seasonings in a medium bowl. Use just enough oil to create a light coating on each slice. Over-saturating prevents proper crisping during cooking.
For classic flavor, try olive oil with sea salt and black pepper. Parmesan cheese adds wonderful savory notes. Ranch seasoning creates a popular crowd-pleasing variation.
Consider breaded versions for extra texture and flavor complexity. Dip pieces in beaten egg before coating with panko crumbs. Almond flour and grated Parmesan create a delicious combination.
Your seasoning choices transform simple vegetables into extraordinary snacks. Experiment with different combinations to discover personal favorites. The possibilities are limited only by your imagination.
“Proper preparation separates good snacks from great ones. Each step builds toward that perfect final bite.”
Take your time during this preparation phase. Rushing through these steps compromises your final results. Your careful attention ensures consistently excellent outcomes.
Mastering the Air Fryer Zucchini (Healthy Crispy Chips) Process
Your journey to perfect vegetable snacks reaches its peak during the cooking phase. This stage transforms your carefully prepared ingredients into something extraordinary. Proper technique here makes all the difference between good and great results.
Preheating for Perfect Results
Always begin by warming up your appliance before adding any food. Set the temperature between 325°F and 370°F for optimal performance. This step ensures your pieces start cooking immediately upon contact.
Preheating creates that ideal cooking environment from the very beginning. Your snacks achieve consistent texture throughout the entire batch. This attention to detail separates amateur attempts from professional outcomes.
Most quality models require just 2-3 minutes to reach the desired temperature. This brief wait pays dividends in your final product. You’ll notice the difference in every perfectly cooked piece.
Arranging Your Chips for Even Air Circulation
Place your seasoned pieces in a single layer within the cooking basket. Leave adequate space between each slice for proper airflow. This prevents steaming and promotes that desirable crisp texture.
Avoid overcrowding at all costs. Work in batches if necessary to maintain proper spacing. This approach ensures each piece receives equal heat exposure.
Your arrangement technique directly impacts the final outcome. Proper spacing allows hot air to circulate freely around every piece. You achieve uniform browning and perfect crunch throughout.
- Preheat your appliance to 325-370°F before adding any food
- Arrange pieces in a single layer with space between them
- Cook in batches rather than overcrowding the basket
- Ensure even air circulation for consistent results
- Achieve perfect texture through proper spacing
Mastering these simple steps transforms your cooking experience. You’ll create reliably excellent snacks every time. The process becomes effortless with practice and attention to detail.
Cooking Time and Temperature Guide
Getting the timing just right transforms your preparation into something spectacular. The perfect temperature creates that ideal texture you crave. Your attention during this phase makes all the difference.

Set your appliance to 370°F for optimal results. This temperature works beautifully for achieving that desirable finish. You’ll create evenly cooked pieces with wonderful texture.
Monitoring for Golden Brown Perfection
Watch your creation carefully during the cooking process. The ideal cooking window falls between 8-13 minutes. Thinner pieces will finish faster than thicker ones.
Check frequently after the 8-minute mark. Remove individual pieces as they reach perfection. This prevents over-browning while others finish cooking.
Your visual assessment matters more than strict timing. Look for that beautiful color development. The texture should feel firm and crisp when ready.
When to Flip and When to Remove
Flip your pieces halfway through the cooking time. This ensures even browning on both sides. Use this moment to rearrange if needed.
Some models might cook faster than others. Adjust your timing based on your specific appliance. You’ll learn its quirks with practice.
Remove finished pieces to a cooling rack immediately. This helps maintain their perfect texture. They’ll continue to crisp up as they cool.
“Perfect timing turns good snacks into great ones. Trust your eyes more than the clock for best results.”
Remember these key points for success:
- Cook at 370°F for 8-13 minutes based on thickness
- Flip halfway through for even coloring
- Remove pieces individually as they finish
- Trust visual cues over strict timing
- Adjust based on your specific appliance model
This careful approach guarantees wonderful outcomes every time. You’ll achieve that ideal crunch without any burnt edges. Your patience during this phase rewards you with perfection.
Delicious Serving Suggestions
Your culinary creation deserves presentation that matches its exceptional quality. The right accompaniments transform these golden brown treats into memorable dining experiences. Discover how to elevate your dish beyond simple snacking.
Thoughtful pairing enhances both flavor and enjoyment. You create complete meals that satisfy every craving. These ideas make your preparation the star of any occasion.
Best Dipping Sauces for Zucchini Chips
Complement your masterpiece with flavorful dipping options. Marinara sauce adds classic Italian flair to each bite. The tomato-based richness pairs beautifully with your preparation.
Creamy ranch dressing offers cool contrast to the warm texture. Pesto provides herbaceous notes that elevate the natural flavors. Hummus creates a protein-packed option for health-conscious enjoyment.
Each sauce brings its own unique character to your dish. You can mix and match based on personal preferences. The possibilities ensure never-ending variety in your meals.
Pairing Ideas for Complete Meals
Transform your creation into a satisfying side dish. Veggie burgers gain extra texture and nutrition from this addition. Sandwiches become more exciting with these crispy accompaniments.
Quinoa burgers benefit from the contrasting crunch element. Caprese sandwiches reach new heights with this flavorful partner. Stuffed vegetable boats make an impressive main course pairing.
Consider these serving occasions for maximum impact:
- Appetizers for gatherings that impress guests with gourmet quality
- Movie night snacks that satisfy cravings without guilt
- Light lunch accompaniments that add nutrition and texture
- Party platters that showcase your culinary skills
Larger pieces work wonderfully as edible scooping utensils. They elevate dip presentations to interactive experiences. Your guests will appreciate this creative serving approach.
“The right presentation transforms good food into great memories. It’s about creating moments around nourishment.”
These serving suggestions prove that eating well can be exciting. You enjoy fantastic flavors while maintaining nutritional goals. Every meal becomes an opportunity for culinary creativity.
Expert Tips for Extra Crispy Results
Want to master that perfect crunch every single time? Professional techniques can elevate your results from good to extraordinary. These insider secrets guarantee consistent outcomes that impress everyone.
You’ll discover how to avoid common pitfalls that sabotage texture. Proper technique makes all the difference between soggy and spectacular. Your efforts will yield that desirable golden finish consistently.
Avoiding Common Mistakes
Never skip preheating your appliance before adding food. This step ensures immediate cooking upon contact. You achieve even results throughout your entire batch.
Using excessive oil prevents proper crisping. A light coating works much better than heavy saturation. Your pieces need just enough to promote browning.
Always flip your creation halfway through cooking. This ensures uniform color on both sides. You avoid uneven results with this simple technique.
Remember these key points for success:
- Always preheat your appliance for immediate cooking action
- Use minimal oil to prevent steaming and promote crisping
- Flip pieces halfway through for even browning
- Cook in batches rather than overcrowding the basket
- Trust visual cues over strict timing guidelines
How to Prevent Sogginess
Thoroughly dry your pieces before seasoning and cooking. Moisture is the enemy of perfect texture. Your patience here pays off in every crunchy bite.
Arrange pieces in a single layer with space between them. Overcrowding leads to steaming instead of crisping. Proper air circulation creates that ideal finish.
Enjoy your creation immediately after cooking for best texture. They tend to soften if left sitting too long. Fresh from the appliance delivers maximum satisfaction.
Store any leftovers in an airtight container. They won’t maintain their perfect crunch though. These treats are always best consumed right away.
“Perfect technique transforms simple ingredients into extraordinary experiences. Attention to detail separates good results from great ones.”
These professional methods ensure wonderful outcomes every time. You’ll avoid disappointment and achieve consistent perfection. Your culinary skills will shine with these expert approaches.
Nutritional Benefits and Storage Tips
Discover how your delicious creation supports wellness while maintaining fantastic flavor. This approach to snacking combines satisfaction with smart nutrition. You’ll appreciate both the taste and health advantages.
Understanding proper preservation methods extends your enjoyment. These techniques maintain quality when you have leftovers. Your efforts continue delivering value beyond the initial serving.
Health Advantages of Air-Fried Snacks
Your preparation method significantly reduces calorie content. Compared to traditional frying, you use minimal oil. This creates a lighter version of your favorite treat.
The vegetable itself provides essential vitamins and minerals. You receive nutritional benefits along with great taste. It’s a winning combination for health-conscious individuals.
This cooking technique preserves more nutrients than deep frying. You enjoy better wellness support with every crunchy bite. Your snack becomes part of a balanced eating plan.
Proper Storage for Leftover Chips
Place any remaining pieces in an airtight container at room temperature. They maintain quality for up to one week using this method. Their texture might soften slightly over time.
For best results, consume your creation immediately after preparation. The ideal crispiness shines when fresh from the appliance. You experience maximum satisfaction right after cooking.
If you have extra produce, consider alternative preparations. Stuffed vegetable boats make excellent use of remaining ingredients. Muffins provide another creative option for surplus items.
| Storage Method | Duration | Texture Quality | Recommended Use |
|---|---|---|---|
| Airtight Container Room Temp | Up to 7 days | Good (softens slightly) | Snacking, Salad Toppings |
| Refrigerated | 3-4 days | Fair (softer texture) | Reheat in Appliance |
| Freezer (not recommended) | 1 month | Poor (becomes soggy) | Not Recommended |
“Smart storage preserves your effort and investment. Proper techniques extend enjoyment while maintaining quality.”
These methods ensure you get the most from your preparation. You minimize waste while maximizing satisfaction. Your culinary creation continues delivering pleasure beyond the first serving.
Conclusion
You now possess everything needed to craft flawless veggie snacks. This approach transforms ordinary ingredients into something extraordinary. Your kitchen adventures just became more exciting.
Customize flavors to match your personal preferences. Experiment with various seasonings and coatings. Make this dish uniquely yours through creative exploration.
Share your successful results with friends and family. Post pictures online to inspire others. Your culinary achievements deserve recognition.
Thank you for joining this delicious journey. May your future creations bring endless joy. Happy cooking and even happier eating!