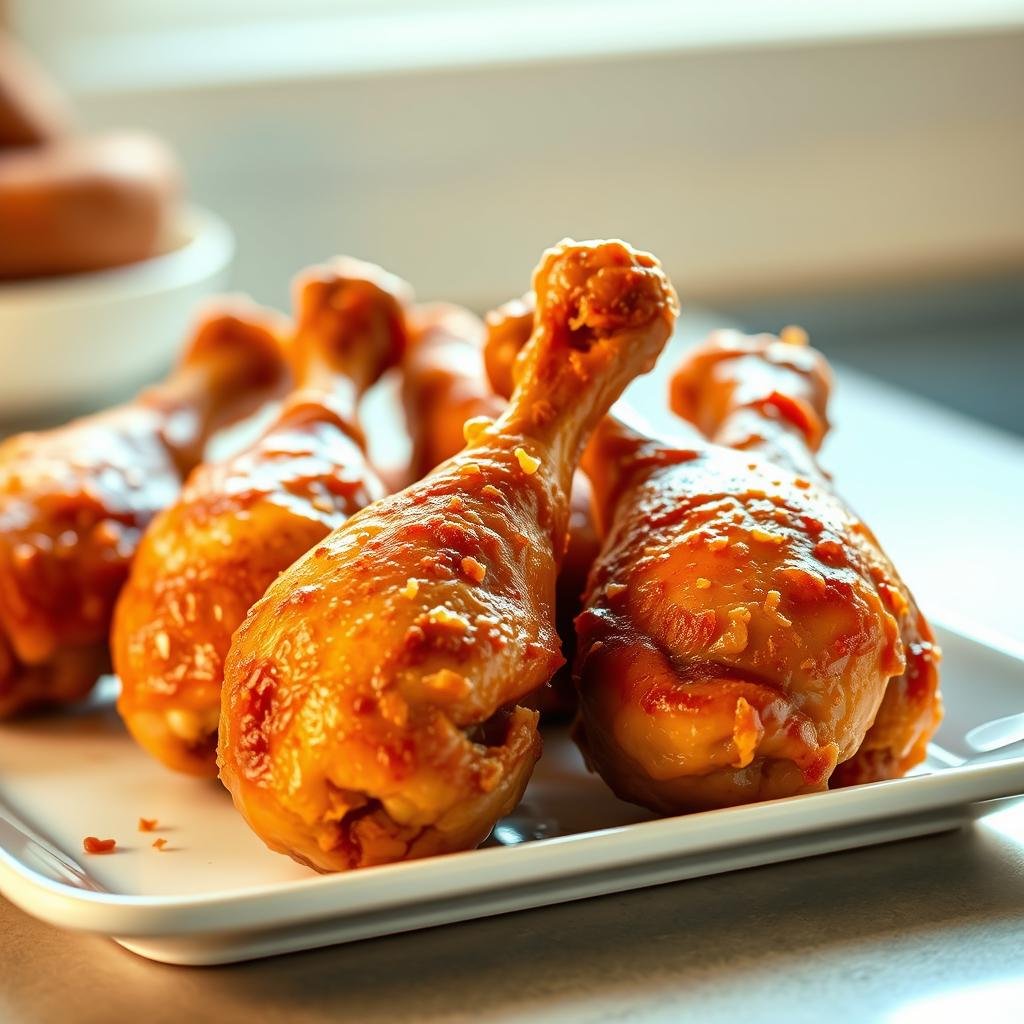
Imagine juicy, tender poultry that practically melts in your mouth. Now picture it with perfectly crispy skin, all ready in about 20 minutes. That’s what you get with this incredible method.
This approach uses rapid hot air circulation to create that golden, crunchy exterior. Meanwhile, the inside stays wonderfully moist and flavorful. You won’t believe how simple it is to achieve restaurant-quality results at home.
Best of all, this dish fits various eating plans like Whole30, keto, and paleo. It’s also budget-friendly, especially when you find great deals on organic pieces. No heavy breading required—just pure, delicious goodness.
Your family will ask for this weekly favorite again and again. Kids love eating them with their hands, making dinner fun and mess-friendly. Get ready for some finger-licking goodness that’s perfect for busy nights.
Follow along for the simple steps and pro tips that guarantee perfect results every time. Let’s make dinner exciting again!
Key Takeaways
- Ready in about 20 minutes with minimal prep work
- Crispy skin with juicy, tender meat inside
- Fits Whole30, keto, paleo, and budget-friendly diets
- No breading needed for a healthier option
- Family-friendly and perfect for quick weeknight meals
- Kids enjoy eating them with their hands
- Can be baked in oven if you don’t have the appliance
Why You’ll Love These Fall-Off-The-Bone Air Fryer Chicken Drumsticks
Picture this: golden-brown perfection that crackles when you bite into it. Juicy, flavorful poultry that practically dissolves on your tongue. This isn’t restaurant magic—it’s what happens when smart technology meets simple ingredients.

Crispy Skin With Juicy, Tender Meat
That incredible 400°F temperature works magic. Rapid hot air circulation creates a beautifully crisp exterior while sealing in natural juices. You get that satisfying crunch followed by unbelievably moist meat.
No more dry, disappointing poultry! The high heat locks in moisture while creating that perfect texture contrast. It’s like having your own personal chef specializing in crispy-yet-tender perfection.
Quick 20-Minute Weeknight Dinner
Busy evenings demand solutions that don’t sacrifice quality. From prep to plate, you’re looking at about twenty minutes. That’s faster than most delivery services!
While traditional oven methods take nearly an hour, this approach slashes cooking time dramatically. You get amazing results without waiting forever. Perfect for those nights when everyone’s hungry now.
Budget-Friendly Family Meal
These economical cuts often cost under $2 per pound, even for organic options. You can feed a family of four for less than $10. That’s real value without compromising on quality or flavor.
Compared to expensive takeout or pre-made meals, you save significantly. Plus, you control exactly what goes into your food—no hidden ingredients or excessive sodium.
Additional benefits you’ll appreciate:
- Healthier than deep frying with similar crispy results
- Minimal oil needed for guilt-free enjoyment
- No complicated techniques—just simple coating and cooking
- Even cooking throughout thanks to optimized air circulation
- Kids love eating with their hands—makes dinner fun
- Adults enjoy the gourmet-quality results with minimal effort
Say goodbye to uneven cooking or soggy skin. This method delivers consistent, restaurant-worthy results every single time. Your family will request this weekly favorite repeatedly!
Essential Ingredients for Perfect Air Fryer Drumsticks
Your journey to perfect poultry begins with smart ingredient choices. The right components work together to create that magical combination of crispy exterior and juicy interior. Quality matters more than quantity here.
Simple, fresh ingredients elevate this dish from ordinary to extraordinary. You don’t need fancy or expensive items. Just a few well-chosen basics make all the difference.
Choosing the Right Chicken Drumsticks
Select pieces of similar size for even cooking. This ensures everything finishes at the same time. Larger legs may need extra minutes.
Look for plump, fresh-looking options with smooth skin. Organic varieties often offer better flavor when available. Buying in bulk saves money for regular meals.
Smart shopping tips:
- Choose uniform sizes for consistent results
- Opt for organic when on sale for better quality
- Consider bulk purchases for budget-friendly meals
- Freshness matters more than brand names
Oil Options for Maximum Crispiness
The right oil creates that golden, crackling exterior everyone loves. It helps spices stick and promotes beautiful browning. Too much makes skin greasy instead of crisp.
Use just one tablespoon to coat your pieces thoroughly. This minimal amount delivers maximum crunch without excess calories.
Best oil choices:
- Olive oil offers great flavor and high smoke point
- Avocado oil provides neutral taste and excellent crispiness
- Melted coconut oil adds subtle sweetness
- Ghee creates rich, buttery notes
- Low-sodium options work for health-conscious cooks
Simple Seasoning Blend That Delivers Big Flavor
Three basic spices create the classic flavor profile. Paprika provides color and subtle sweetness. Garlic powder adds savory depth.
Salt enhances all the other flavors beautifully. This simple combination works magic on poultry. Let coated pieces rest ten minutes before cooking.
Flavor variations to try:
- Ranch seasoning for creamy herb notes
- Taco blend for Mexican-inspired meals
- Smoked paprika and cumin for smoky warmth
- Chinese five-spice for Asian flair
- Chipotle powder for spicy kick
Fresh spices make a noticeable difference in taste. Don’t use old, faded powders from the back of your cupboard. Quality ingredients transform simple recipes into memorable meals.
Experiment freely to find your family’s favorite combinations. The basic method welcomes personal creativity. Your perfect blend awaits discovery!
How to Prepare Your Chicken for the Air Fryer
Getting ready for cooking is just as important as the cooking itself. Proper preparation ensures that every piece comes out perfectly crispy and juicy. Follow these simple steps for amazing results every time.

Properly Coating the Drumsticks
Start with a large mixing bowl. Add your poultry pieces along with oil and seasonings. Use tongs to toss everything together gently.
This method ensures even coverage without messy hands. Every surface gets coated for maximum flavor. Avoid overcrowding the bowl for best results.
Key coating tips:
- Use tongs for easy turning and even coverage
- Ensure each piece gets fully coated with oil
- Let seasoned pieces rest for 10 minutes before cooking
- Work in batches if preparing large quantities
Preheating Your Air Fryer for Best Results
Many models benefit from preheating to 400°F. This step ensures immediate crisping upon contact. It mimics the sear of traditional frying methods.
Your appliance reaches optimal temperature faster this way. Food starts cooking perfectly from the first moment. Check your manufacturer’s instructions for specific guidance.
While the unit preheats, you can finish seasoning your pieces. This efficient timing makes the whole process faster. You’ll appreciate the time savings on busy nights.
Arranging Drumsticks for Optimal Air Flow
Place your pieces in a single layer in the basket. Leave some space between each one for proper circulation. This prevents steaming and promotes even browning.
Never stack or overlap your poultry pieces. Crowding leads to uneven cooking and soggy skin. Cook in batches if your appliance is smaller.
Larger units can handle more pieces at once. Still, always maintain that crucial space between items. Proper arrangement makes all the difference in texture.
Arrangement guidelines:
- Always use a single layer for best results
- Leave space between pieces for air movement
- Cook in batches rather than overcrowding
- Use tongs for safe placement and rearrangement
For easier cleanup, you can add foil to the bottom. Just make sure it doesn’t block air vents around the edges. This little trick saves time after dinner.
These preparation steps are simple but essential. They guarantee that perfect combination of crisp exterior and tender interior. Your efforts here ensure spectacular results every time.
Step-by-Step Cooking Instructions
Ready to transform simple ingredients into something spectacular? The actual cooking process is where the magic happens. Follow these straightforward steps for incredible results that will impress everyone at your table.

Setting the Right Temperature and Time
Begin by setting your appliance to 400°F. This temperature creates the perfect environment for crispy exteriors and moist interiors. Most models reach this heat quickly.
Cook your poultry pieces for 18-22 minutes. Larger units might need 415°F for optimal results. Adjust timing based on the size of your pieces.
| Appliance Size | Temperature | Time Range |
|---|---|---|
| Small (2-3 qt) | 400°F | 18-20 minutes |
| Medium (4-5 qt) | 400°F | 19-21 minutes |
| Large (6+ qt) | 415°F | 20-22 minutes |
The Crucial Flipping Technique
After 13 minutes, pause the cooking process. Carefully open the basket and use tongs to turn each piece. This ensures even browning on all sides.
Proper flipping prevents one side from becoming too dark. It also promotes uniform cooking throughout. Your effort here guarantees perfect texture.
Checking for Perfect Doneness
Always use an instant-read thermometer for accuracy. Insert it into the thickest part of the meat, avoiding the bone. This gives you the true internal temperature.
165°F indicates safe consumption. For ultra-tender results, aim for 180°F. Visual cues include golden-brown skin and clear juices.
Pro tips for perfect results:
- Monitor timing as models vary slightly
- Cook slightly longer for extra crispiness if desired
- Briefly reheat first batches to restore crispness
- Trust your thermometer over visual cues alone
Follow these simple steps for foolproof results every time. The process requires no complex skills—just set it, flip it, and check it. You’ll achieve restaurant-quality meals with minimal effort.
Delicious Flavor Variations to Try
One incredible recipe becomes many with simple twists. The basic method welcomes endless creativity without complicating your cooking process. You can transform your meal into completely new experiences.
These flavor options keep your weekly rotation exciting. They require minimal extra effort but deliver maximum impact. Your family will love discovering new favorites.
Zesty Ranch Seasoning Option
Add one tablespoon of ranch seasoning to your spice blend. This creates a tangy, herby flavor that appeals to all ages. Kids especially love this familiar taste.
Pair these seasoned legs with fresh vegetable sticks. Carrots, celery, and cucumbers make perfect companions. The cool crunch complements the zesty coating beautifully.
Smoky Paprika and Cumin Blend
Substitute smoked paprika for regular in your recipe. Add half a teaspoon of cumin for depth. This combination creates aromatic warmth reminiscent of outdoor barbecue.
Serve these smoky pieces with sweet corn or potato salad. The flavors create a perfect summer meal experience. You’ll feel like you’re at a backyard cookout.
Spicy Buffalo Sauce Finish
Mix two tablespoons of hot sauce with one teaspoon of oil. Add half a teaspoon each of mustard powder and garlic powder. Toss with your cooked pieces for the final two minutes.
This method prevents burning while maintaining crispiness. The spicy coating adds exciting heat without overwhelming flavor. Classic celery sticks and blue cheese dressing complete the experience.
| Variation | Key Ingredients | Best Pairings | Cooking Tip |
|---|---|---|---|
| Ranch Style | 1 tbsp ranch seasoning | Fresh vegetable sticks | Add to dry spice mix |
| Smoky Blend | Smoked paprika + ½ tsp cumin | Corn or potato salad | Replace regular paprika |
| Buffalo Style | Hot sauce, oil, mustard & garlic powder | Celery & blue cheese | Add last 2 minutes |
| Taco Inspired | 1 tbsp taco seasoning (no paprika) | Spanish rice & beans | Use instead of basic spices |
| Asian Twist | 1 tsp Chinese five-spice + ginger | Stir-fried vegetables | Great with sesame oil |
All variations maintain the health benefits of your cooking method. Most require no additional oil beyond the initial coating. You get exciting flavors without compromising your nutritional goals.
Experiment with your favorite spice blends or sauces. The basic technique works wonderfully with countless flavor profiles. Your personal perfect recipe awaits discovery!
Measurements ensure consistent results every time. Following these guidelines guarantees your family enjoys perfectly seasoned meals. You’ll love how one basic method creates so many delicious possibilities.
Pro Tips for the Crispiest Chicken Drumsticks
Mastering your technique makes all the difference between good and extraordinary results. These professional secrets transform your cooking experience. They guarantee that perfect crackle with every bite.
Don’t let simple mistakes ruin your meal. Follow these pro tips for absolute perfection. Your family will notice the incredible improvement immediately.
Avoiding Overcrowding in the Air Fryer Basket
Always arrange pieces in a single layer inside your appliance. Overcrowding traps steam and creates soggy skin instead of crispiness. This is the most common mistake home cooks make.
Cook in batches if you have many pieces to prepare. This ensures proper hot air circulation around each item. Your results will show the dramatic difference.
Key spacing guidelines:
- Never stack or overlap poultry pieces
- Leave space between items for air movement
- Batch cooking prevents steaming and ensures crispness
- Shake the basket lightly if flipping isn’t possible
Why Foil Affects Crispiness (And When to Use It)
Foil can block essential air flow in your cooking appliance. This reduces the crispiness of your finished dish. Many people unknowingly make this error.
Skip foil entirely for maximum texture perfection. Accept a bit more cleanup for superior results. If you must use it, leave edges completely open.
Only place foil on the very bottom for easier cleaning. Never cover the entire basket area. Proper air circulation cannot happen with blocked vents.
Adjusting for Different Air Fryer Sizes
Larger units like 6.8-quart models may need 415°F. Smaller appliances typically work best at 400°F. This temperature adjustment compensates for capacity differences.
Know your appliance’s specific quirks and capabilities. A 6.8-quart model fits 8-10 pieces comfortably. Smaller baskets might only handle 4-5 items properly.
Larger pieces need more cooking time rather than higher heat. Adjust your timing based on visual cues and thermometer readings. Learning your machine’s personality ensures perfect results every time.
These professional techniques prevent common kitchen failures. They deliver restaurant-quality meals right in your home. Your cooking journey just became much more rewarding!
Serving Suggestions and Side Dish Ideas
Great sides and sauces transform your protein from a simple dish into a memorable feast. The right accompaniments highlight that beautiful crispy texture while balancing flavors perfectly. Your family will appreciate how these complete the meal experience.
Plan your sides to be ready when your main dish finishes cooking. This ensures everything reaches the table hot and delicious. The contrast between crispy and creamy or fresh creates dining magic.
Classic American Comfort Food Pairings
Indulge in traditional favorites that everyone loves. Creamy garlic mashed potatoes make an excellent companion. Their smooth texture contrasts wonderfully with the crispy exterior.
Air-fried French fries create the ultimate comfort food combination. Both elements get that perfect golden crunch. Serve with plenty of napkins for this finger-food feast!
Macaroni and cheese brings childhood nostalgia to your table. The rich, cheesy goodness complements the savory seasoning beautifully. Kids especially adore this combination.
Healthy Vegetable Side Options
Balance your meal with fresh, vibrant vegetables. A simple tomato and cucumber salad adds refreshing crunch. The light dressing doesn’t overpower the main flavors.
Steamed broccoli provides nutritional power and beautiful color. Its mild taste lets the seasoned protein shine. A sprinkle of lemon juice enhances both components.
Roasted carrots develop natural sweetness when cooked. Their tender texture makes them family-friendly. The orange color creates an appealing plate presentation.
Dipping Sauces That Complement Perfectly
While your recipe stands perfectly on its own, sauces can add exciting variety. Offer options to suit different preferences at your table. These condiments transform each bite into new experiences.
Cool ranch dressing provides tangy herb notes. Its creaminess balances the spicy heat if you used seasoning. This remains America’s most popular choice for good reason.
Sweet and smoky BBQ sauce adds finger-licking goodness. Choose varieties without high fructose corn syrup for better quality. The sticky sweetness creates that classic barbecue feel.
Spicy buffalo sauce brings game-day excitement to dinner. Mix it with a little melted butter for authentic flavor. Celery sticks and blue cheese complete this experience.
| Sauce Type | Best For | Preparation Tip | Kid-Friendly Rating |
|---|---|---|---|
| Ranch Dressing | Cool contrast to spicy seasoning | Use Greek yogurt base for protein boost | ★★★★★ |
| BBQ Sauce | Sweet and smoky flavor enhancement | Warm slightly for better viscosity | ★★★★☆ |
| Buffalo Sauce | Spicy kick for adult preferences | Mix with melted butter for authenticity | ★★☆☆☆ |
| Honey Mustard | Sweet and tangy combination | Use Dijon mustard for depth | ★★★★☆ |
| Garlic Aioli | Rich, creamy garlic enhancement | Add lemon zest for brightness | ★★★☆☆ |
Remember that well-seasoned pieces might need no sauce at all. The crispy skin and juicy interior often provide sufficient flavor. Let your guests decide their preferred way to enjoy.
These legs work wonderfully in various meal contexts. They shine at casual family dinners and impressive game-day spreads. Picnics become special when you bring these along.
Pro serving tips:
- Serve immediately for maximum crispiness
- Offer multiple sauce options for different tastes
- Include fresh vegetable sticks for crunch and nutrition
- Shred leftovers for tacos, salads, or casseroles
- Let kids enjoy with simple corn or carrot sticks
Transform your protein into a complete feast with these easy ideas. The right sides and sauces make dinner something everyone anticipates. Your cooking deserves this perfect finishing touch!
Storing and Reheating Leftovers
Your delicious meal deserves to stay amazing even after dinner ends. Smart storage keeps your food safe and tasty for days. Learn how to maintain that perfect texture and flavor.
These simple techniques prevent waste and save money. You can enjoy restaurant-quality meals anytime. Let’s explore the best ways to preserve your cooking.
Proper Refrigeration Techniques
Place cooled pieces in an airtight container immediately. This prevents drying and maintains freshness. Your fridge can keep them for up to three days.
The skin may soften during storage. That’s completely normal and easily fixed. Just remember to reheat properly later.
Key refrigeration tips:
- Cool completely before storing to prevent condensation
- Use shallow containers for faster cooling
- Label with dates to track freshness
- Keep on refrigerator shelves, not in the door
How to Recrisp Skin in the Air Fryer
Your appliance works magic on leftovers too. Set it to 400°F for four to five minutes. This restores that beautiful crackling texture.
Avoid the microwave for reheating. It makes the skin rubbery instead of crisp. Your special machine brings back that fresh-cooked quality.
Check the internal temperature reaches 165°F again. This ensures safety while bringing back perfection. You’ll love how it tastes just like new.
Freezing and Repurposing Cooked Chicken
Freeze your extras for up to three months. Use freezer-safe bags and remove excess air. Thaw overnight in the refrigerator before reheating.
Don’t let leftovers go to waste. Transform them into exciting new dishes. Remove the skin and shred the meat for other recipes.
Creative repurposing ideas:
- Add to tacos with fresh salsa and guacamole
- Mix into salads for protein-packed lunches
- Create hearty soups with vegetables and broth
- Make casseroles with pasta or rice
Save those bones for making rich broth in your pressure cooker. This adds incredible value to your meal preparation. You get multiple uses from one cooking session.
Batch cooking intentionally makes future meals easier. Prepare extra pieces specifically for later use. Your future self will thank you on busy days.
Proper storage maintains both safety and deliciousness. These techniques ensure you enjoy great food days later. Your cooking investment keeps giving returns!
Conclusion: Your New Go-To Chicken Recipe
You now have a fantastic way to create amazing meals quickly. This method delivers crispy skin and tender meat every time. It’s perfect for busy nights when you want something delicious.
Your family will love how simple and tasty this dish is. It saves money compared to ordering takeout. Plus, you control the ingredients for a healthier option.
Try different seasonings to keep things exciting. Share your results and rate this recipe online. Explore other easy ideas for your kitchen appliance.
Say goodbye to dry poultry and hello to your new favorite meal! This reliable approach makes cooking fun and stress-free. Enjoy restaurant-quality results right at home.