Imagine biting into perfectly golden, incredibly crunchy wings that taste like they came from your favorite sports bar. Now picture making them in your own kitchen with minimal effort and maximum flavor. This revolutionary approach transforms your weeknight dinners and game day snacks.
Our method delivers that deep-fried texture without the greasy mess. You get that satisfying crunch using just a fraction of the oil. The results will shock you with their professional quality and incredible taste.
Best of all, this approach takes less time than traditional baking methods. You can have restaurant-quality wings ready faster than ordering takeout. The simplicity will make this your go-to recipe for any occasion.
Key Takeaways
- Achieve restaurant-quality texture with minimal oil and effort
- Cook faster than traditional oven baking methods
- Use simple ingredients commonly found in your pantry
- Enjoy a healthier alternative to deep frying
- Perfect for quick weeknight meals or entertaining guests
- Versatile dish that works as appetizer or main course
- Consistently delivers crispy results every time
Why You’ll Never Make Wings Another Way Again
Once you experience this cooking method, you will wonder why you ever used your oven. The results speak for themselves with every golden bite. Your taste buds will thank you for the upgrade.

The Magic of Air Frying
This incredible kitchen gadget uses hot air circulation to work its wonders. It surrounds your food with intense heat that moves rapidly. This creates that perfect outer texture we all love.
You get that satisfying crunch using minimal oil. The machine locks in natural juices during the cooking process. Your finished dish stays moist inside while becoming beautifully brown outside.
Many home chefs report never returning to their old methods after trying this. The difference in quality becomes immediately apparent with the first batch. It transforms how you think about preparing favorite foods.
Why These Wings Beat Traditional Methods
Traditional approaches often leave you with uneven results. Baking can produce rubbery skin while deep-frying creates greasy messes. This modern technique eliminates those common frustrations.
You achieve professional quality right from your countertop. The table below shows how this method compares to others:
| Method | Cook Time | Oil Used | Crispiness Level | Cleanup Effort |
|---|---|---|---|---|
| Oven Baking | 45-60 minutes | Moderate | Medium | Medium |
| Deep Frying | 15-20 minutes | High | High | High |
| Air Frying | 18-22 minutes | Low | High | Low |
Notice how this approach gives you the best of both worlds. You get the quick preparation of frying with the health benefits of baking. The minimal cleanup makes it perfect for busy weeknights.
Small batches come out perfectly every time. This makes it ideal for couples or small families. You can enjoy restaurant-quality food without leaving home.
The efficiency of this process will save you valuable minutes. You spend less time cooking and cleaning. That means more time enjoying your delicious creation.
Everything You Need for Perfect Air Fryer Chicken Wings
Your journey to perfect wings starts with gathering the right components. Having everything organized before you begin makes the process smooth and enjoyable. This preparation sets the stage for outstanding results.
Essential Ingredients for Crispy Success
Quality components make all the difference in your final dish. Start with two pounds of fresh poultry pieces, both drums and flats. The right blend of spices transforms simple ingredients into something extraordinary.
You’ll need one tablespoon of olive oil to help everything adhere properly. This oil creates that beautiful golden exterior without excess grease. It helps your seasoning stick while preventing sticking during cooking.
Your spice blend should include garlic powder and onion powder for depth. Add paprika for color and mild sweetness. Don’t forget salt and black pepper for that essential savory balance.
Each component plays a specific role in creating harmony. The powders distribute evenly while the oil carries flavor into every crevice. This combination ensures every bite delivers maximum taste.
Must-Have Kitchen Tools
The right equipment makes your cooking experience effortless. A reliable cooking appliance is your most important tool. Popular models like PowerXL or Cuisinart deliver consistent results.
Your appliance’s basket needs to accommodate your ingredients properly. A quality air fryer basket ensures even heat circulation for uniform cooking. This gives you that perfect crispness from edge to center.
Gather a large bowl for mixing your components thoroughly. Tongs make handling hot pieces safe and simple. A cutting board and paring knife help with any last-minute prep work.
Having these tools ready streamlines your entire process. You avoid frantic searches mid-recipe and maintain your workflow. This organization leads to better results and more enjoyable cooking.
Remember to pat your pieces completely dry before seasoning. This crucial step removes excess moisture that would prevent proper browning. Your effort here rewards you with that satisfying crackle when biting in.
How to Prep Your Wings for Maximum Crispiness
Proper preparation separates average results from extraordinary ones. Your attention to detail during this stage determines your final outcome. Mastering these simple techniques guarantees that perfect crackle with every bite.

The Secret to Dry Wings
Moisture is the enemy of perfect texture. You must remove every drop of surface liquid before cooking. This critical step ensures that beautiful golden brown exterior.
Use clean paper towels to pat each piece thoroughly. Press firmly to absorb all visible moisture. The surface should feel completely dry to your touch.
This drying process creates the foundation for that satisfying crunch. It allows heat to penetrate directly rather than steaming the skin. Your effort here rewards you with professional-quality results.
Seasoning Like a Pro
Flavor distribution makes all the difference in your final dish. Use a large mixing bowl to combine your ingredients properly. This method ensures consistent taste throughout your batch.
Drizzle olive oil over your dried pieces first. The oil helps spices adhere while promoting even browning. Toss gently to coat each piece completely.
Add your seasoning blend gradually while tossing continuously. This technique prevents clumping and ensures uniform coverage. Every surface should receive its share of flavor.
Follow this simple preparation guide for best results:
| Step | Action | Key Benefit | Time Required |
|---|---|---|---|
| 1 | Pat pieces dry | Removes moisture for better browning | 2 minutes |
| 2 | Add oil to bowl | Helps seasoning stick and prevents sticking | 1 minute |
| 3 | Toss with spices | Ensures even flavor distribution | 2 minutes |
| 4 | Arrange in single layer | Allows proper air circulation for crispiness | 1 minute |
Work in batches if preparing larger quantities. Overcrowding during seasoning reduces quality and consistency. Proper spacing ensures each piece receives individual attention.
Remember that oil serves multiple purposes in your preparation. It carries flavor into every crevice while creating that beautiful crust. The right amount makes your seasoning stick without making things greasy.
This straightforward process sets the stage for amazing results. You invest mere minutes for restaurant-quality outcomes. The simplicity will make this your favorite preparation method.
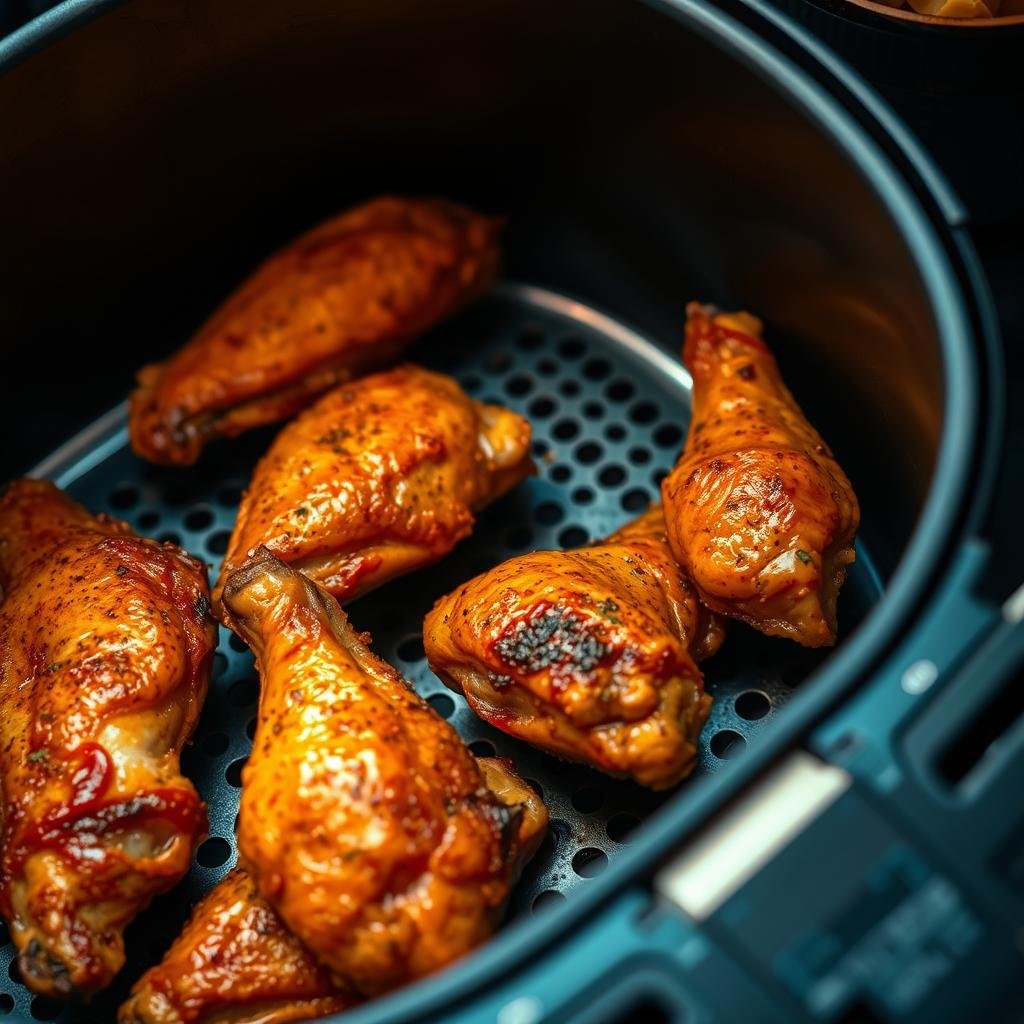
Air Fryer Chicken Wings (Crispy in 20 Minutes): Step-by-Step Guide
Ready to transform your kitchen into a personal sports bar? This straightforward process delivers professional results with minimal effort. Follow these simple steps for golden perfection every time.

Preheating for Perfect Results
Begin by setting your appliance to 400°F. Allow it to heat for about two minutes. This crucial step ensures immediate crisping when you add your ingredients.
Proper preheating creates the ideal environment for that satisfying crunch. It jumpstarts the cooking process for uniform results. Your effort here pays off in that beautiful golden exterior.
The Flipping Technique That Makes All the Difference
Carefully arrange your seasoned pieces in the fryer basket. Ensure they rest in a single layer without touching. This spacing allows hot air to circulate freely around each piece.
Set your timer for ten minutes. When the alert sounds, use tongs to flip each piece gently. This simple action ensures both sides achieve equal browning.
Continue cooking for another eight minutes. Watch for that perfect golden color and audible crispness. Your total cooking time stays under twenty minutes.
| Step | Action | Duration | Key Outcome |
|---|---|---|---|
| 1 | Preheat appliance | 2 minutes | Creates ideal cooking environment |
| 2 | Arrange in basket | 1 minute | Ensures proper air circulation |
| 3 | First cooking phase | 10 minutes | Establishes initial crispness |
| 4 | Flip pieces | 1 minute | Promotes even browning |
| 5 | Final cooking phase | 8 minutes | Achieves golden perfection |
Make sure you monitor during the final minutes. Cooking times may vary slightly between models. You want that perfect balance of crispy outside and juicy inside.
This method delivers consistent results with minimal attention. The simple flip makes all the difference in quality. You achieve restaurant-quality texture with home kitchen convenience.
Creative Flavor Variations to Try Tonight
Your culinary adventure doesn’t end with basic seasoning – discover how simple additions create extraordinary flavor experiences. These finishing touches transform your golden creations into signature dishes that will become family favorites.
Buffalo Sauce Twist
Toss your perfectly cooked pieces in classic Buffalo sauce for that authentic sports bar taste. This tangy, spicy coating creates an addictive combination that keeps people coming back for more.
The heat level can be adjusted to your preference. Mild versions work for family meals while extra spicy satisfies heat seekers.
Honey Garlic Glaze Option
Create a sweet and savory masterpiece by heating butter and honey in a skillet. Toss your pieces to coat evenly then simmer until sticky and golden brown.
The caramelization process develops incredible depth. This method delivers professional-quality results with minimal effort.
Asian-Inspired Five Spice Version
Experiment with complex aromatic profiles using Chinese five spice seasoning. Sprinkle this distinctive blend over your glazed pieces for an exotic twist.
The combination of star anise, cloves, cinnamon, and pepper creates magic. Your guests will marvel at the sophisticated flavor development.
For extra sticky glazes, consider broiling as an alternative finishing method. Watch closely to prevent burning while achieving that perfect glossy coating.
Each option adds unique character to your crispy base. Serve these variations with confidence knowing you’ve created something special.
What to Serve With Your Crispy Chicken Wings
Complete your meal with perfect pairings that elevate your golden creations. The right accompaniments turn your main dish into a memorable feast. Discover combinations that balance flavors and textures beautifully.
Classic Dipping Sauces
Traditional options bring comfort and familiarity to your table. Ranch dressing offers a cool, creamy contrast to spicy flavors. Its herbal notes complement the savory taste of your main dish.
Blue cheese dressing provides a tangy, robust alternative. The sharpness cuts through richness for a balanced bite. Crumbled cheese adds texture and depth to each dip.
Consider these popular sauce recipes for variety:
- Garlic Mayo – Creamy with a pungent kick
- Pink Sauce – Zesty and slightly sweet
- Pineapple Sauce – Tropical and refreshing
- BBQ Ketchup – Smoky and familiar
Perfect Side Dishes
Your appliance creates wonderful companions for your meal. Crispy Parmesan Brussels sprouts offer a savory, crunchy option. They cook while your main dish finishes its cycle.
Kale chips provide a light, nutritious alternative to potatoes. Their delicate crunch matches the texture of your golden pieces. Avocado fries deliver creaminess inside a crispy exterior.
These sides add visual appeal and nutritional balance. They demonstrate the versatility of your countertop appliance. Your guests will appreciate the thoughtful, cohesive spread.
Each component works together harmoniously. You create restaurant-quality meals right at home. The combinations will become your new entertaining staples.
Storing and Reheating Like a Pro
Your delicious creations deserve proper handling to maintain their amazing quality. Mastering storage techniques ensures you enjoy perfect results days later. These professional methods preserve texture and flavor beautifully.
Refrigeration Best Practices
Cool your cooked pieces completely before storing. This prevents condensation that would ruin the crispy texture. Use airtight containers to maintain freshness.
Your refrigerator keeps them perfect for up to three days. This gives you plenty of time to enjoy leftovers. Proper storage makes quick snacks always available.
Freezing for Future Cravings
Freezing extends your enjoyment for months. Ensure pieces cool entirely before packaging. Use freezer-safe bags or containers for best results.
Remove as much air as possible before sealing. This prevents freezer burn and maintains quality. Label packages with dates for easy tracking.
Your frozen treasures stay delicious for three months. This way you always have something wonderful ready. It’s the perfect solution for unexpected guests.
Reheating to Maintain Crispiness
Your appliance works magic bringing leftovers back to life. The right approach restores that perfect crunch. Follow these simple steps for amazing results.
For refrigerated pieces, set temperature to 400°F. Heat for three to four minutes until crispy. This short time makes everything perfect again.
Frozen items need slightly different treatment. Use 375°F for the best outcome. Cook for ten minutes, then flip carefully.
Continue cooking for another eight to ten minutes. Watch for that golden color and audible crispness. Your total time stays under twenty minutes.
| Storage Method | Duration | Reheating Temp | Reheating Time | Key Consideration |
|---|---|---|---|---|
| Refrigeration | 3 days | 400°F | 3-4 minutes | Ensure complete cooling first |
| Freezing | 3 months | 375°F | 18-20 minutes | Flip halfway through cooking |
Always arrange pieces in a single layer during reheating. This allows proper air circulation for even crispness. Make sure you don’t overcrowd the basket.
These techniques reduce waste and maximize convenience. You can enjoy restaurant-quality results anytime. It’s the smart way to manage your cooking.
Conclusion: Your New Go-To Wing Recipe
You now possess a game-changing kitchen secret. This recipe delivers incredible results every time. It’s the smart way to enjoy your favorite food.
Each serving offers amazing nutrition too. You get 213 calories with 18g protein. The balance of flavor and health makes it perfect for any occasion.
Trust this updated method for foolproof success. Share your delicious creations with friends and family. They’ll marvel at your culinary skills.
Keep this guide bookmarked for future cravings. Your air fryer opens doors to endless possibilities. Explore more recipes and expand your cooking repertoire today!