Imagine creating golden brown delights that satisfy your craving for something delicious. You can achieve this with your countertop appliance. This method transforms ordinary ingredients into extraordinary treats.
These treats use just a splash of oil for the entire batch. They come out perfectly seasoned every single time. You’ll want to make them again and again!
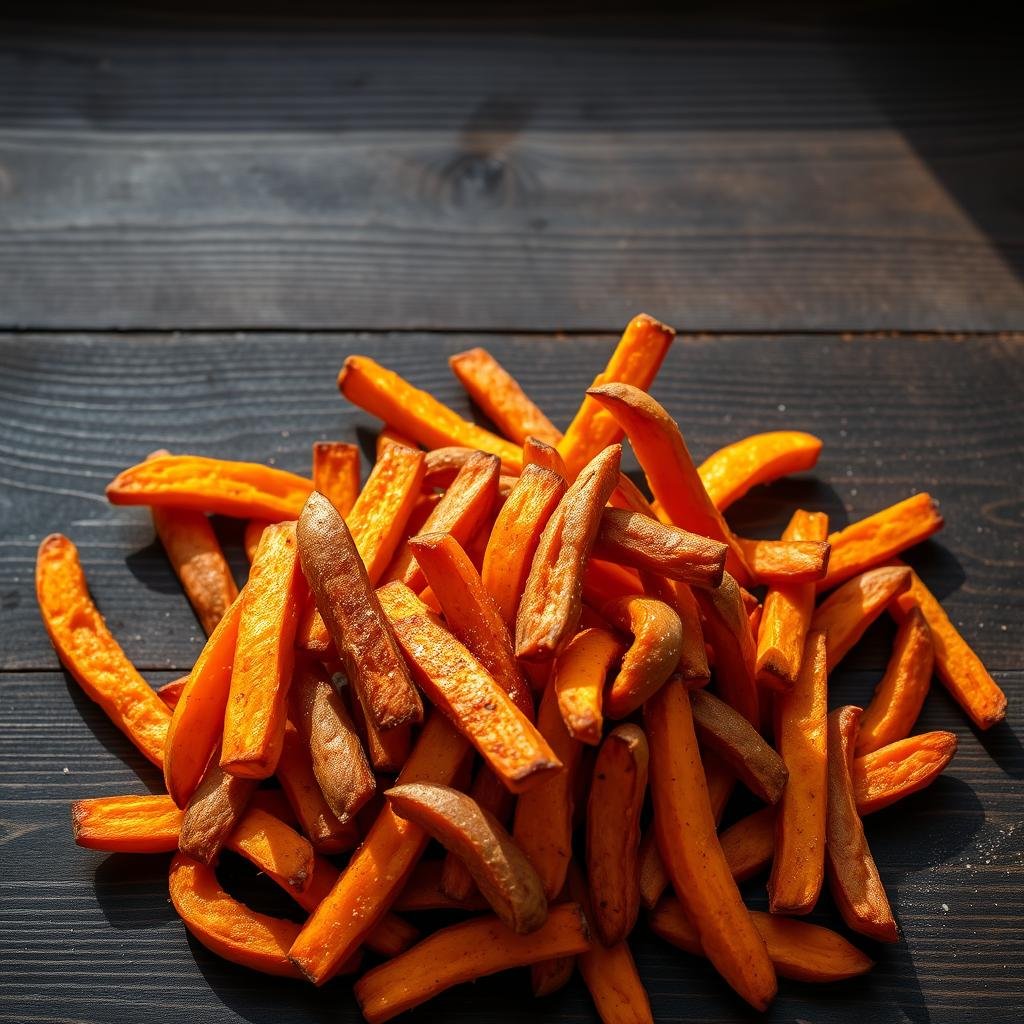
The technique creates soft-on-the-inside, crunchy-on-the-outside results. It works year-round, unlike seasonal alternatives. Proper preparation prevents sogginess and ensures perfect texture.
Key Takeaways
- Learn to make delicious fries using minimal oil compared to deep frying
- Discover why this cooking method has become a popular healthy alternative
- Understand how to achieve golden brown results with tender interiors
- Master a recipe that uses under a tablespoon of oil for the entire batch
- Prepare to get consistent results whether cooking for yourself or guests
- Learn how this technique preserves natural sweetness while adding crunch
- Discover why this method works throughout all seasons
Why Air Fryer Sweet Potato Fries Will Become Your Go-To Side Dish
Picture this: a golden-brown, crispy-edged delight that pairs perfectly with any meal. These oven-style treats transform ordinary evenings into extraordinary culinary experiences. They offer a satisfying crunch without the guilt of traditional deep-fried options.

You get restaurant-quality results right at home. The method uses minimal oil while delivering maximum flavor. It’s a game-changer for weeknight dinners and special occasions alike.
The Perfect Balance of Health and Flavor
Traditional deep-frying submerges food in excessive oil. This technique uses just a fraction of that amount. You achieve that desirable crispy exterior with significantly less fat.
The high heat circulation creates beautiful browning through the Maillard reaction. This chemical process develops complex, smoky flavors. Your taste buds will celebrate the delicious results.
Nutrient preservation becomes a key advantage. Compared to oil-immersion methods, more vitamins remain intact. You enjoy better nutrition without sacrificing texture or taste.
| Aspect | Traditional Deep Frying | Air Circulation Method |
|---|---|---|
| Oil Used | 4-6 cups | Under 1 tablespoon |
| Cooking Time | 10-12 minutes | 12-15 minutes |
| Calorie Reduction | Base Level | Up to 80% less |
| Texture Result | Often greasy | Consistently crispy |
Why Your Air Fryer Makes All the Difference
Rapid hot air circulation works like a miniature convection oven. It surrounds every piece with intense, dry heat. This creates that perfect crunch you crave.
Temperature control prevents burning while ensuring even cooking. No more soggy centers or charred edges. Every batch comes out consistently delicious.
The time savings will impress you. Most recipes finish in under fifteen minutes. You get fantastic results faster than traditional oven baking.
This appliance handles everything from weeknight sides to party snacks. It complements burgers, salads, and grilled proteins beautifully. Once you try it, you’ll wonder how you lived without it.
Essential Ingredients for Perfectly Crispy Sweet Potato Fries
Great results start with quality components. Your ingredient choices directly impact texture and flavor. Selecting the right items makes all the difference in your final dish.

Choosing the Right Sweet Potatoes
Look for garnet or jewel varieties with smooth skin. Their vibrant orange flesh offers optimal flavor and texture. Larger specimens around 13 ounces work best for uniform shapes.
These potatoes cook evenly and maintain structural integrity. Their natural sweetness balances beautifully with savory seasonings. You’ll appreciate their consistent performance in every batch.
The Secret Crisping Agent: Arrowroot vs Cornstarch
Both powder options create a light, delicate crust. Arrowroot works wonderfully for those with corn allergies. Cornstarch provides excellent crispiness without overwhelming flavor.
The science behind these agents involves moisture absorption. They form a protective layer that enhances browning. Your results will showcase that perfect golden exterior.
Oil Selection for Optimal Results
Avocado oil boasts a high smoke point ideal for high-heat cooking. Extra virgin olive oil requires careful use to prevent burning. Exactly one tablespoon suffices for the entire batch.
This minimal amount creates that desirable crisp texture. It helps seasonings adhere while promoting even browning. Your finished dish will have that professional quality appearance.
Seasoning Combinations That Elevate Your Fries
Black pepper and paprika create a classic flavor profile. Smoked paprika adds depth and complexity to your recipe. Garlic powder introduces savory notes that complement natural sweetness.
Add salt at the very end to prevent moisture loss. Use precise measurements – typically quarter teaspoon increments. This ensures consistent flavor in every preparation.
Experiment with chili powder for a spicy kick. These ingredients transform simple sides into extraordinary experiences. Your personal touch makes each batch uniquely delicious.
Step-by-Step Preparation: Your Path to Perfect Fries
Your journey to exceptional results begins with proper preparation. Each stage builds upon the previous one to create that ideal texture. Follow these steps carefully for consistent success with every batch.

Cutting Techniques for Even Cooking
Start by selecting firm, fresh produce. Create uniform ¼-inch thick spears for consistent results. Square off pointy tips to prevent burning during the cooking process.
This careful approach ensures all pieces cook at the same rate. You’ll achieve that beautiful golden color simultaneously across your entire batch. Uniform sizing is the foundation of perfect texture.
The Ice Bath Method: Why It’s Crucial
Place your cut pieces in a large bowl filled with ice water. Soak them for at least thirty minutes. For optimal results, consider leaving them overnight.
This process removes excess starch that causes sogginess. The science behind it ensures maximum crispiness during the final stage. Your efforts here directly impact the final texture.
Drying and Coating Your Fries Properly
After soaking, pat each piece completely dry with a kitchen towel. Moisture is the enemy of that desired crisp coating. Take your time with this crucial step.
Use two large spoons to toss the dried pieces with your chosen starch. Add pepper and paprika at this stage. Then incorporate exactly one tablespoon of oil until the powder becomes invisible.
| Preparation Step | Time Required | Key Benefit |
|---|---|---|
| Cutting & Trimming | 5-7 minutes | Even cooking prevention |
| Ice Water Soak | 30 minutes minimum | Starch removal for crispness |
| Drying Process | 3-5 minutes | Moisture elimination |
| Coating & Seasoning | 2-3 minutes | Flavor distribution |
This systematic approach transforms ordinary ingredients into extraordinary results. Your patience during preparation pays dividends in the final product. Many recipes skip these steps, but they make all the difference.
Air Frying Process: Achieving That Golden Crisp
Mastering the final cooking stage separates ordinary results from extraordinary ones. Your attention to detail during this phase determines whether you get that perfect golden exterior with tender interior. The right techniques transform prepared ingredients into spectacular outcomes.
Preheating Your Air Fryer for Success
Always begin by warming up your appliance before adding any food. Set the temperature between 380-400°F and let it run for 5-10 minutes. This crucial step ensures immediate crisping action when ingredients enter the hot environment.
Preheating creates the ideal cooking foundation from the very start. Your results will showcase superior texture compared to starting with a cold unit. This simple habit makes a dramatic difference in final quality.
Cooking Time and Temperature Guidelines
Maintain 380°F throughout the cooking process for optimal results. This temperature provides the perfect balance between thorough cooking and beautiful browning. Most batches require approximately 12 minutes of total time.
Thicker cuts may need additional minutes while thinner pieces cook faster. Watch for visual cues rather than relying solely on the clock. The majority of pieces should display that desirable golden brown color when ready.
| Fry Thickness | Temperature | Approximate Time | Visual Indicator |
|---|---|---|---|
| 1/4 inch | 380°F | 10-12 minutes | Light golden brown |
| 1/2 inch | 380°F | 14-16 minutes | Medium golden brown |
| 3/4 inch | 375°F | 18-20 minutes | Deep golden brown |
The Importance of Flipping and Spacing
Arrange your pieces in a single layer within the cooking basket. Ensure they don’t touch each other to allow proper air circulation. Overcrowding causes steaming instead of crisping, ruining your desired texture.
Halfway through the cooking time, gently turn each piece using tongs. This flipping action ensures even browning on all surfaces. For larger quantities, work in multiple batches rather than compromising on spacing.
Different appliance models may require slight adjustments. Smaller units often need reduced temperatures or shorter times. Larger capacity models can handle more volume while maintaining good results.
Pro Tips for the Crispiest Air Fryer Sweet Potato Fries Ever
Transform your kitchen results with these insider tips that guarantee perfect crispiness. Professional chefs use these methods to achieve that desirable golden texture consistently. Your efforts will pay off with spectacular outcomes every time.
Soaking Secrets for Maximum Crispiness
The ice water bath represents the most crucial step in your preparation. Soaking for at least thirty minutes removes excess starch that causes sogginess. For ultimate results, consider overnight soaking in chilled water.
The science behind this process involves starch molecule extraction. Cold water draws out these compounds that would otherwise prevent proper crisping. Your patience here directly translates to superior texture.
Avoiding Common Sogginess Mistakes
Never add salt before the cooking process begins. This mineral draws out moisture during the heating way, creating steam instead of crispness. Always season after cooking for perfect results.
Ensure your pieces are completely dry before adding oil. Moisture is the enemy of that desirable crunchy exterior. Use kitchen towels to pat each piece thoroughly.
Wait five minutes after cooking before adding seasoning. Then allow another five minutes before serving. This resting period lets steam escape, enhancing the final texture dramatically.
Batch Cooking Strategies for Perfect Results
Never overcrowd your cooking basket. Pieces should never touch each other during the process. Proper spacing allows hot air circulation around every surface.
When preparing large quantities, work in multiple batches. Keep finished portions warm in a 200°F oven while subsequent ones cook. This maintains temperature without sacrificing texture.
Different appliance sizes may require adjusted approaches. Smaller units often need reduced temperatures for optimal outcomes. Larger capacity models can handle more volume effectively.
| Common Mistake | Why It Causes Sogginess | Professional Solution |
|---|---|---|
| Adding salt early | Draws out moisture during cooking | Season after cooking completes |
| Inadequate drying | Creates steam instead of crispness | Pat completely dry with towels |
| Overcrowding basket | Prevents proper air circulation | Maintain space between pieces |
| Skipping ice bath | Leaves starch that hinders crisping | Soak 30+ minutes in cold water |
These techniques separate ordinary results from extraordinary ones. Your attention to these details ensures consistently perfect texture. Once mastered, you’ll achieve professional-quality outcomes every time.
Creative Seasoning Variations and Dipping Sauces
Elevate your culinary creations beyond basic preparations. The right combinations transform simple sides into extraordinary experiences. Your flavor journey begins with thoughtful seasoning choices and complementary dips.
Savory Spice Blends to Try
Global flavors bring excitement to your table. Za’atar offers Mediterranean flair with its herbal complexity. Creole seasoning delivers Southern warmth through balanced heat.
Italian seasoning provides classic herbal notes that pair beautifully. These dry seasonings integrate perfectly during the coating stage. Use approximately half a teaspoon per pound for optimal flavor distribution.
Sweet and Spicy Combinations
Contrasting flavors create memorable taste experiences. Cinnamon with chili powder develops intriguing depth. Smoked paprika alongside garlic powder offers smoky savoriness.
These combinations highlight natural sweetness while adding dimension. Measure carefully to maintain balance rather than overwhelm. Your guests will appreciate the sophisticated flavor profiles.
Homemade Dipping Sauce Recipes
Creamy chipotle sauce combines sour cream with minced chipotle in adobo. This creates smoky heat balanced by cool creaminess. It’s among our favorite recipes for entertaining.
Vegan options accommodate diverse dietary preferences. Three-ingredient vegan honey mustard requires just mustard, agave, and plant-based mayo. Vegan tzatziki uses dairy-free yogurt with cucumber and dill.
Classic ketchup remains a timeless favorite. Consider mixing it with mayo for homemade fry sauce that children adore. Always serve wet sauces on the side to maintain perfect texture.
Serving Suggestions and Meal Pairing Ideas
Unlock the full potential of your golden creations with inspired meal combinations. The right partnerships transform simple sides into memorable dining experiences. Your culinary artistry deserves presentation that highlights every delicious aspect.
Perfect Protein Pairings
These vibrant spears complement various main courses beautifully. Plant-based options like black bean burgers create balanced vegetarian meals. Grilled chicken or turkey burgers offer classic American comfort food combinations.
Consider marinated portobello mushrooms for earthy flavor contrasts. Tofu nuggets provide protein-rich alternatives that children enjoy. The natural sweetness creates pleasant counterpoints to savory main dishes.
| Protein Type | Recommended Pairing | Flavor Profile | Preparation Tip |
|---|---|---|---|
| Plant-Based | Black bean burgers | Savory with subtle spice | Add avocado slices |
| Poultry | Grilled chicken breast | Herbaceous and light | Use lemon herb marinade |
| Vegetarian | Mushroom sliders | Earthy and robust | Top with caramelized onions |
| Vegan | Chickpea tuna salad | Bright and tangy | Serve on lettuce cups |
Transforming Fries into a Complete Meal
Turn your side into the main event with creative additions. Load them with vegetarian chili and melted cheese for satisfying comfort food. Top with pulled pork or barbecue tofu for protein-packed presentations.
Serve alongside large green salads for balanced nutrition. The colors and textures create visually appealing plates. This approach works wonderfully for quick weeknight dinners.
Breakfast becomes extraordinary when served with eggs and avocado. The combination offers sustained energy throughout your morning. It’s a fantastic way to use leftovers creatively.
Kid-Friendly Serving Strategies
Children embrace new foods when presentation feels fun. Offer multiple dipping sauces in small colorful cups. Ketchup remains the classic favorite, but ranch and honey mustard work well too.
Create a “fry bar” with different seasoning options for parties. Let kids customize their own portions with various toppings. This interactive approach encourages trying new flavors.
Remember that timing matters for family meals. Prepare main proteins first since these cook quickly. Serve immediately while hot and crispy for best reception.
Portion planning ensures everyone gets enough. Allow one medium vegetable per person as a side dish. Always make extra because these disappear quickly!
Storage and Reheating: Enjoy Your Fries for Days
Your delicious creations deserve proper handling to maintain their wonderful qualities. Smart storage techniques ensure you can savor every bite over multiple days. These methods preserve texture and flavor beautifully.
Proper Refrigeration Techniques
Cool your cooked pieces completely before storing them. This prevents condensation that would make them soggy. Use an airtight container for best results.
Your refrigerator keeps them fresh for three to four days. Avoid stacking them too high to prevent crushing. A shallow bowl works better than deep containers.
Freezing Methods for Long-Term Storage
Spread cooled pieces in a single layer on a baking sheet. Freeze them solid before transferring to freezer bags. This prevents clumping and maintains individual pieces.
Frozen batches maintain quality for about three months. Portion them into meal-sized amounts for convenience. You’ll appreciate having ready-to-cook portions available.
Reheating to Maintain Crispiness
Your countertop appliance works perfectly for restoring that delightful texture. Set it to 380°F for optimal results. Reheat for two to five minutes depending on quantity.
Frozen portions need additional time – usually three extra minutes. Shake the basket halfway through for even heating. This method works far better than microwave alternatives.
Some recipes suggest microwave reheating as an emergency option. Place pieces on a paper towel and use the crisp setting. However, expect softer results compared to air reheating.
Conclusion: Your New Favorite Healthy Side Dish
You’ve discovered a game-changing approach to creating delicious sides. This method transforms simple ingredients into extraordinary results with minimal effort.
These golden delights offer restaurant-quality texture right at home. They’re naturally gluten-free, vegan, and contain no refined sugars. You can enjoy them guilt-free while satisfying your cravings.
Mastering this technique opens endless culinary possibilities. You’ll save money compared to store-bought versions. Share this knowledge with friends and family for memorable meals.
Your kitchen adventures now include a versatile, crowd-pleasing option. Continue experimenting with seasonings and dips to make each batch uniquely yours. This preparation will become your go-to for any occasion!