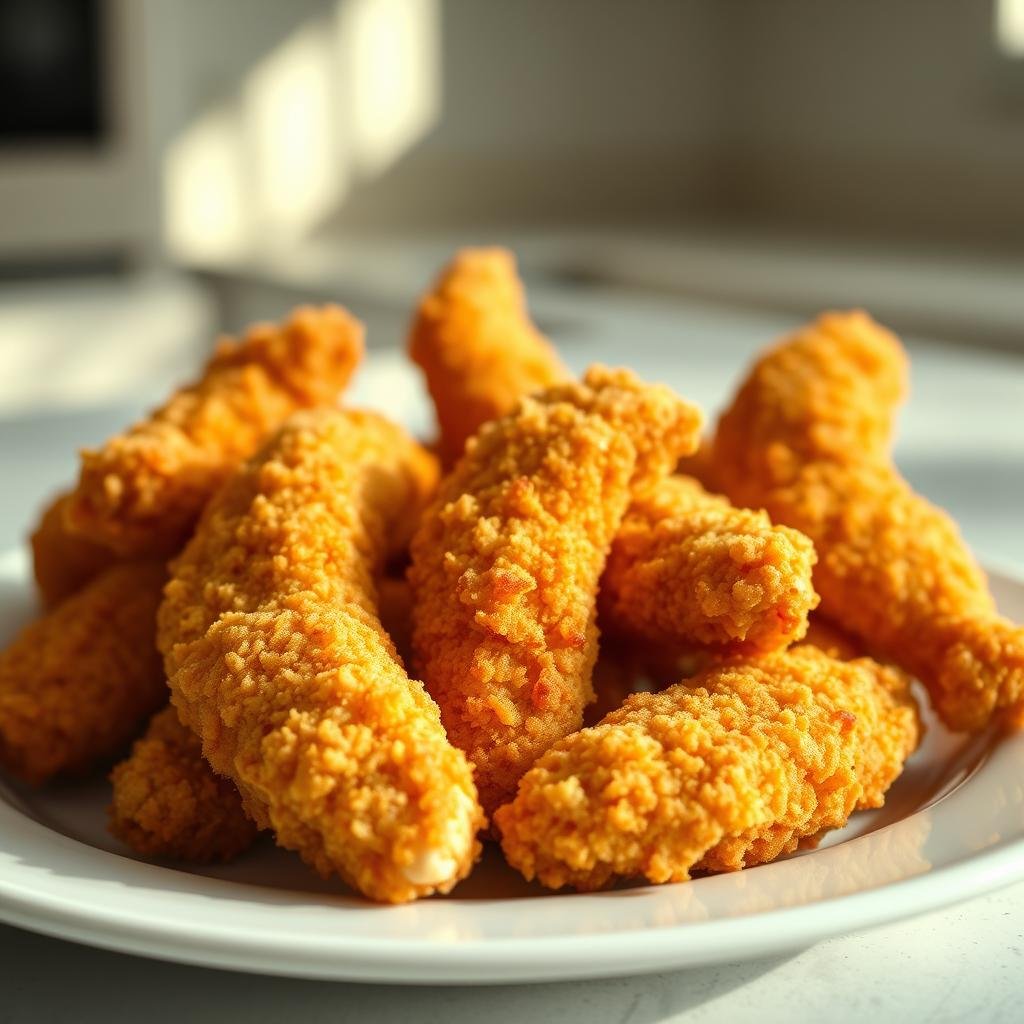
Are you tired of the same old dinner routine? Imagine serving up golden, crispy strips that make your children’s eyes light up with excitement. This magical kitchen gadget transforms ordinary ingredients into extraordinary meals.
You get that perfect fried texture without all the extra oil. No more drive-thru runs when you can create better versions right at home. The results rival your favorite restaurant’s offerings.
Busy parents will appreciate how quickly everything comes together. This comprehensive guide walks you through each simple step. We’ve tested and perfected every detail for family use.
Get ready for delicious dipping sauces and creative serving ideas. This will become your new weekly staple that everyone enjoys. Say goodbye to dinner battles forever!
Key Takeaways
- Transform classic fried favorites into healthier meals kids adore
- Achieve restaurant-quality crispy texture with significantly less oil
- Save time and money by making better versions at home
- Perfect for busy weeknights with quick preparation
- Includes delicious dipping sauces and creative serving suggestions
- Tested and perfected for guaranteed family approval
- Become your new go-to weekly dinner solution
Why Air Fryer Chicken Tenders Are a Game-Changer for Family Dinners
Ever wonder how to serve golden, crispy strips that everyone loves? This modern kitchen gadget makes it possible with amazing results. You get that satisfying crunch without the guilt.
The Health Benefits of Air Frying vs Traditional Frying
Traditional deep-frying soaks food in oil. This method uses hot air circulation instead. You achieve similar texture with far less fat.
Studies show this approach reduces fat content by 70-80%. That means fewer calories and less saturated fat. Your family enjoys cleaner meals without sacrificing taste.
Compare nutritional values side by side. Homemade versions contain no preservatives or additives. You control every ingredient that goes into your meal.
“The reduction in oil consumption translates directly to better heart health and weight management.”
Why This Preparation Beats Takeout Every Time
Forget waiting for delivery that often arrives lukewarm. Your crispy strips cook in just 10-15 minutes. That’s faster than most delivery services!
Cost savings add up quickly too. Restaurant versions cost three times more than homemade. You save money while eating better quality food.
Customize flavors to match your family’s preferences. Add extra seasoning or keep it simple. The consistency becomes perfect once you master the technique.
No more minimum orders or delivery fees. Craving something delicious? Your kitchen becomes the best restaurant in town.
Essential Ingredients for Perfect Air Fryer Chicken Tenders
Great meals start with smart choices in your kitchen. The right components transform simple strips into something extraordinary. Quality matters more than you might realize.

Choosing the Right Chicken: Tenderloins vs Breast Strips
Not all poultry pieces cook the same way. Tenderloins offer natural tenderness and uniform size. This means even cooking throughout every batch.
Breast strips require more careful preparation. They often vary in thickness, leading to uneven results. Butcher Box delivers consistently excellent quality for best outcomes.
The Best Breadcrumb Options for Maximum Crispiness
Your coating makes all the difference in texture. Panko creates a lighter, crispier finish than traditional varieties. The Japanese-style crumbs absorb less oil while cooking.
Trader Joe’s offers a chunkier texture that many families prefer. For dietary needs, consider these alternatives:
- Gluten-free breadcrumbs work perfectly
- Crushed cornflakes add delightful crunch
- Almond flour creates low-carb options
Mixing a small amount of oil into your coating helps achieve that golden color. The right blend ensures maximum crispness every time.
Seasoning Secrets That Kids Actually Love
Flavor combinations make meals exciting for young palates. Ranch seasoning packets deliver familiar taste without overwhelming spice. Rotisserie chicken seasoning adds depth they’ll recognize.
Mild paprika and garlic powder provide subtle warmth. Parmesan cheese mixed into the coating introduces savory notes children enjoy. These elements create balanced profiles that please everyone.
| Ingredient Type | Best Choices | Alternative Options |
|---|---|---|
| Protein Base | Butcher Box Tenderloins | Quality Breast Strips |
| Coating | Panko Breadcrumbs | Gluten-Free Crumbs |
| Flavor Boosters | Parmesan Cheese | Nutritional Yeast |
| Seasoning Blends | Ranch Mix | Garlic Herb Blend |
Preparation techniques enhance your results. An egg wash helps the coating adhere properly. Buttermilk soaking adds tenderness and subtle tang.
A tiny amount of hot sauce in your egg mixture introduces complexity without heat. Fresh, quality ingredients make a noticeable difference in final results. Your efforts yield restaurant-quality meals right at home.
Must-Have Kitchen Tools for Air Frying Success
Imagine transforming your kitchen into an efficient cooking station. The right equipment makes all the difference between good and great results. Smart investments pay off with every meal you create.
Selecting the Right Air Fryer for Your Family’s Needs
Your appliance choice determines cooking capacity and convenience. The COSORI model stands out for its preset functions and easy cleaning. One-touch programs simplify cooking various foods perfectly.
Consider your household size when choosing basket dimensions. Larger families benefit from bigger capacity units. Multiple layers cook more food simultaneously.
Digital controls provide precise temperature adjustments. Clear viewing windows let you monitor progress without opening the unit. These features ensure consistent results every time.
Essential Accessories for Easy Preparation and Cleanup
Proper tools streamline your cooking process from start to finish. A meat thermometer guarantees perfect doneness without guesswork. Silicone-tipped tongs protect your appliance’s non-stick surface.
Three-compartment dredging stations organize your breading workflow efficiently. They keep ingredients separated and mess contained. You can even store prepped items before cooking.
Avocado oil spray creates even browning without sticking. It delivers that golden finish everyone loves. Wire rack accessories improve air circulation and make removal simple.
Non-abrasive brushes preserve your basket’s coating during cleaning. Airtight containers maintain freshness for prepped items and leftovers. Measuring tools ensure consistent seasoning in all your recipes.
“The right tools don’t just make cooking easier—they transform the entire experience from stressful to joyful.”
Organize your workspace for maximum efficiency. Group prep tools near your cooking station. Keep cleaning supplies within easy reach. This workflow optimization saves precious minutes during busy evenings.
Your investment in quality equipment pays dividends through better meals and happier family dinners. These tools become trusted partners in your culinary adventures.
Step-by-Step Preparation: Your Roadmap to Perfect Tenders
Getting that golden, crispy exterior starts with smart preparation techniques. Follow this simple step-by-step guide for restaurant-quality results every time. Your family will notice the difference immediately.
How to Properly Prepare Your Chicken Pieces
Begin with fresh, quality poultry. Pat each piece completely dry with paper towels. This creates the perfect surface for coating adhesion.
Cut into uniform 2-inch pieces for even cooking. Slightly flatten thicker sections with your palm. Consistent thickness means no more overcooked edges with raw centers.
Work efficiently while your appliance preheats. This timing trick saves precious minutes during busy evenings. You’ll appreciate the streamlined workflow.
Creating the Perfect Dredging Station Setup
Organize three stations in this order: flour mixture, egg wash, then breadcrumbs. Use separate containers for each component. This prevents cross-contamination and mess.
For the flour station, combine all-purpose flour with salt and pepper. Add ranch seasoning for extra flavor if desired. One cup typically covers a standard batch.
Enhance your egg wash with Worcestershire sauce or tomato paste. These ingredients add depth without overwhelming young palates. Whisk until perfectly smooth.
The Secret to Even Coating Every Single Time
Use one hand for wet ingredients and the other for dry. This prevents clumping and ensures smooth workflow. Press breadcrumbs firmly into each tender using your hands.
Shake off excess coating at each station. This technique guarantees uniform coverage without thick, doughy spots. Let breaded pieces rest 5 minutes before cooking.
This resting period allows the coating to set properly. You’ll achieve that perfect chicken tenders air-fried crispiness everyone loves. The results speak for themselves.
“Proper preparation separates good home cooking from great restaurant-quality results.”
Prepare all pieces first, then cook in batches. Place parchment paper between layers when storing. This prevents sticking and maintains that beautiful coating.
Your efforts yield incredible rewards at the dinner table. These techniques transform simple ingredients into extraordinary meals. Watch those little faces light up with joy!
Mastering the Air Frying Process
Perfect results come from understanding your appliance’s capabilities. The right technique transforms simple ingredients into crispy masterpieces. You control every aspect for consistent outcomes.
Optimal Temperature and Timing Settings
Set your unit between 390-400°F for ideal cooking. This range creates that golden exterior without burning. Precision matters for the best texture.
Cook for 8-10 minutes total. Flip halfway through the cooking time. Thicker pieces might need an extra minute per side.
Always preheat your appliance before starting. This ensures consistent heat from the first moment. Your results improve dramatically with this simple step.
How to Arrange Tenders for Perfect Air Circulation
Place pieces in a single layer within the basket. Leave space between each piece for proper airflow. Overcrowding leads to uneven cooking.
Work in batches of 4-6 pieces for best results. This might take a few extra minutes but guarantees perfection. Patience rewards you with superior texture.
Lightly spray both sides with oil before cooking. This promotes even browning and crispiness. You achieve that restaurant-quality finish effortlessly.
When to Flip and How to Check for Doneness
Flip your pieces at the halfway mark. Use silicone tongs to avoid damaging the coating. This simple action ensures even coloring on both sides.
Check internal temperature with a meat thermometer. Insert it into the thickest part of the largest piece. You want a reading of 165°F for perfect doneness.
Look for visual cues like golden brown color and crispy texture. The aroma will tell you when they’re ready. Trust your senses along with the thermometer.
Keep cooked batches warm in a 200°F oven. This maintains crispness while you finish remaining pieces. Everyone enjoys hot, fresh food together.
“Perfect air frying combines precise temperature control with smart arrangement techniques for consistently spectacular results.”
Pro Tips for Air Fryer Chicken Tender Perfection
Want to achieve that perfect golden crunch every single time? Mastering your appliance requires understanding a few key techniques. These professional suggestions elevate your results from good to absolutely amazing.
You’ll avoid common pitfalls that many home cooks encounter. Simple adjustments make a huge difference in final texture and flavor. Your family will notice the improvement immediately.

Avoiding Common Air Frying Mistakes
Overcrowding remains the number one error people make. Your basket needs space for proper hot air circulation. Crowded pieces steam instead of achieving that desirable crispiness.
Always preheat your unit before adding food. This ensures consistent temperature from the very beginning. Skipping this step leads to uneven cooking results.
Shake off excess breading before cooking. Too much coating becomes soggy rather than crispy. Press crumbs firmly to prevent separation during the cooking process.
Understand your specific appliance’s characteristics. Some models have hot spots that require basket rotation. Learning these quirks guarantees better outcomes.
How to Prevent Soggy or Unevenly Cooked Tenders
Cut your protein into uniform 2-inch pieces. Consistent size means everything cooks at the same rate. You avoid some pieces being done while others remain undercooked.
Use a light, even oil spray on both sides. This promotes browning without adding excess fat. Don’t skip the flipping step halfway through cooking.
Let breaded pieces rest for five minutes before cooking. This allows the coating to set properly. The result is a crispier exterior that stays intact.
Work in batches rather than overcrowding. Though it takes slightly longer, the quality improvement justifies the extra time. Keep cooked batches warm in a low oven.
Testing for Doneness Without Cutting Into the Chicken
Use an instant-read thermometer for perfect results. Insert it into the thickest part of the largest piece. You want an internal temperature of 165°F.
This method preserves juiciness better than visual inspection. Cutting into pieces releases valuable juices. Your chicken strips remain moist and tender.
Look for visual cues like golden brown coloring. The aroma will also tell you when they’re ready. Combine these observations with temperature reading for certainty.
Remember that carryover cooking continues after removal. Your food gains a few extra degrees while resting. Remove pieces just before they reach the target temperature.
| Common Issue | Prevention Technique | Result Improvement |
|---|---|---|
| Soggy Coating | Shake off excess breading | Crispier texture |
| Uneven Cooking | Uniform 2-inch pieces | Consistent doneness |
| Dry Results | Instant-read thermometer | Perfect juiciness |
| Steamed Texture | Avoid overcrowding basket | Better air circulation |
| Burning | Understand appliance quirks | Even browning |
“The difference between good and great comes down to mastering these simple yet crucial techniques that ensure perfect results every time.”
Reheat leftovers in your appliance rather than the microwave. This maintains that desirable crispy texture. You enjoy fresh-tasting results even the next day.
These professional tips transform your cooking experience. You gain confidence with each successful batch. Your family enjoys restaurant-quality meals right at home.
Kid-Approved Dipping Sauce Recipes
Transform your golden strips into an interactive dining experience with homemade accompaniments. These simple preparations elevate your meal from ordinary to extraordinary. Your children will love choosing their favorite combinations.
Creating custom blends takes just minutes but makes a huge impact. You control ingredients for healthier options than store-bought versions. Watch those little faces light up with excitement at the variety.
Classic Honey Mustard That’s Better Than Store-Bought
Achieve the perfect balance of sweet and tangy flavors children adore. Combine 1/3 cup Dijon mustard with 1/4 cup raw honey. Add a pinch of garlic powder for subtle depth.
Whisk until smooth and creamy. Adjust proportions to match your family’s preference. This versatile sauce pairs beautifully with numerous dishes.
Creamy Ranch Dressing with a Healthy Twist
Reinvent this classic favorite using Greek yogurt instead of sour cream. The result offers tangy richness with significantly less fat. Fresh dill and parsley add bright herbal notes.
Combine with buttermilk for authentic texture. Your version contains no preservatives or artificial ingredients. It becomes a nutritious option everyone enjoys.
Simple BBQ Sauce That Packs Flavor Without Spice
Create a mild, smoky blend perfect for sensitive palates. Tomato paste forms the base with apple cider vinegar acidity. Brown sugar provides subtle sweetness without overwhelming heat.
Smoked paprika adds depth without spiciness. Adjust ingredients to achieve your desired consistency. This homemade version rivals any restaurant offering.
Consider these additional crowd-pleasing variations:
- Buffalo style: blend melted butter with mild hot sauce and Worcestershire
- Creamy jalapeño: use pickled peppers without seeds for flavor without burn
- Restaurant copycat: recreate famous sauces with simple pantry ingredients
Presentation matters for young diners. Serve options in small individual bowls. This allows personal preference without cross-contamination.
Fresh herbs elevate ranch dressing instantly. Smoked paprika transforms basic BBQ into something special. These small touches make big differences in final results.
| Sauce Type | Key Ingredients | Preparation Time |
|---|---|---|
| Honey Mustard | Dijon mustard, honey, garlic powder | 5 minutes |
| Healthy Ranch | Greek yogurt, fresh herbs, buttermilk | 10 minutes |
| Mild BBQ | Tomato paste, brown sugar, smoked paprika | 15 minutes |
| Buffalo Variation | Melted butter, mild hot sauce, Worcestershire | 8 minutes |
“Homemade sauces transform simple meals into memorable dining experiences that children request repeatedly.”
Storage is simple and convenient. Most preparations keep refrigerated for up to one week. Use airtight containers to maintain freshness.
Offer two or three options during meals. This variety keeps dinner exciting and engaging. Your children will enjoy experimenting with different combinations.
Creative Serving Suggestions Beyond the Basic Plate
Your culinary creativity takes center stage with these innovative serving ideas. Transform simple meals into exciting dining experiences that delight young eaters. These approaches turn ordinary dinners into memorable family moments.

Presentation matters almost as much as taste when feeding children. Interactive options encourage participation and exploration. You create positive associations with various foods through fun presentations.
Turning Tenders into Fun Finger Food Platters
Create colorful platters that invite little hands to explore. Arrange your golden strips alongside vibrant vegetable sticks and fresh fruit slices. Include multiple dipping sauces in small containers for variety.
This approach transforms mealtime into an engaging activity. Children enjoy choosing their own combinations and flavors. You encourage balanced eating without pressure or negotiation.
- Rainbow vegetable selection: carrot sticks, cucumber rounds, bell pepper strips
- Fresh fruit accompaniments: apple slices, grapes, berries
- Sauce variety: three different options in small ramekins
- Interactive layout: separate compartments for each food type
Salad Toppers That Make Greens Exciting for Kids
Crispy strips transform ordinary salads into exciting meals. Add them to Caesar or arugula caprese arrangements for extra appeal. The combination of textures and temperatures creates irresistible dishes.
Even salad-resistant children will enjoy greens with this approach. The familiar favorite makes new ingredients more approachable. You introduce healthier options in a welcoming format.
Prepare individual salad plates for each family member. Let everyone customize their own creation. This personal touch increases acceptance and enjoyment.
Sandwich and Wrap Ideas for Lunchbox Reinvention
Reinvent lunchtime with these simple yet brilliant ideas. Whole wheat tortillas create perfect wraps with lettuce and favorite sauces. Brioche buns transform strips into gourmet sandwich experiences.
These options work beautifully for school lunches or quick meals at home. They maintain excellent texture when packed properly. Use airtight containers to preserve freshness throughout the day.
Consider these additional creative applications:
- Bento box arrangements: bite-sized pieces with complementary sides
- Pizza toppings: sliced strips over homemade or prepared pizza
- Pasta companions: served alongside mac and cheese for comfort meals
- Breakfast twists: paired with waffles and maple syrup for morning treats
Your prepared strips stay delicious for several days when stored correctly. They become versatile protein options for various meals and snacks. Cold strips straight from the refrigerator make excellent quick snacks too.
“Creative presentation transforms resistance into enthusiasm, making mealtime joyful for everyone involved.”
These serving suggestions expand your culinary repertoire significantly. You create variety while using the same base preparation. Your family enjoys new experiences without additional cooking time.
Meal Prep and Storage Strategies
Imagine opening your freezer to find ready-to-cook meals that save precious evening hours. Smart planning transforms your kitchen into an efficient meal factory. You gain freedom from daily cooking stress while serving delicious food.
How to Make Large Batches for Busy Weeks
Double or triple your recipe during weekend preparation. This approach maximizes your cooking time investment. You create multiple meals from one efficient session.
Dedicate 1-2 hours for weekly prep work. The results yield dinners for several days. Your future self will thank you during hectic weeknights.
Organize ingredients assembly-line style for efficiency. This method streamlines the breading process significantly. You produce consistent quality across all batches.
Proper Storage Techniques for Maximum Freshness
Cool cooked pieces completely before storing. This prevents condensation that causes sogginess. Your crispy texture remains intact for later enjoyment.
Use an airtight container for refrigerator storage. This maintains optimal freshness for up to one week. Label with dates for proper rotation.
Separate layers with parchment paper when stacking. This technique preserves the delicate coating. Your prepared chicken stays perfect until reheating.
Freezing Raw and Cooked Tenders for Future Meals
Freeze raw breaded pieces on baking sheets first. Then transfer to your chosen airtight container. This prevents sticking and maintains individual piece integrity.
Portion frozen items into meal-sized quantities. This allows convenient thawing of only what you need. Your freezer becomes an organized meal library.
Follow these essential freezing guidelines:
- Flash-freeze raw breaded pieces for 1 hour before final packaging
- Use freezer-grade packaging to prevent freezer burn
- Label clearly with contents and preparation date
- Maintain consistent freezer temperature at 0°F or below
- Rotate older items to the front for first use
“Proper storage transforms cooking from a daily chore into a strategic advantage that saves time and reduces stress.”
Thaw frozen items safely in the refrigerator overnight. This gradual method preserves texture and food safety. You achieve perfect results every time.
Your organized approach yields incredible time savings. Weeknight dinners become effortless and enjoyable. The whole family benefits from your smart planning.
Reheating Tricks That Maintain Perfect Crispiness
Leftovers become a gourmet experience with the right reheating approach. Your golden strips regain their original texture and flavor through proper techniques. Discover how to enjoy second-day meals that taste freshly made.
Why the Air Fryer Beats the Microwave Every Time
Microwaves create soggy, rubbery textures that disappoint. The hot air circulation in your appliance works differently. It recrisps the exterior while warming the interior perfectly.
This method preserves that desirable crunch everyone loves. You avoid the steam buildup that ruins quality. The results rival freshly cooked pieces every time.
Temperature and Timing for Perfect Reheated Tenders
Set your unit to 350°F for refrigerated pieces. Heat for 2-3 minutes until thoroughly warmed. This step restores that beautiful golden color.
Frozen cooked items need 400°F for optimal results. Cook for 5 minutes per side without thawing. The high temperature quickly revives frozen tender quality.
Lightly spray with oil before reheating. This enhances crispness and prevents drying. Shake the basket halfway through for even heating.
Follow these essential guidelines for best results:
- Reheat only what you’ll immediately consume
- Use a wire rack for oven alternatives at 400°F
- Monitor closely to prevent overcooking
- Enjoy nearly fresh-made quality every time
“Proper reheating transforms leftovers into meals that taste as good as the first time, preserving both texture and flavor integrity.”
Your appliance becomes the ultimate tool for meal enjoyment. Even previously frozen pieces emerge crispy and delicious. This technique maximizes your cooking investment beautifully.
Answering Your Air Fryer Chicken Tender Questions
Have questions about making the perfect crispy strips? You’re not alone. Many home cooks wonder about variations and adaptations. This section covers everything you need to know.
Cooking Frozen Tenders: What You Need to Know
Yes, you can cook frozen pieces directly in your appliance. This saves valuable time during busy evenings. No thawing required!
Add 2-3 minutes per side when cooking from frozen. The extra time ensures thorough cooking. Your results will be just as crispy and delicious.
Preheat your unit to 400°F for best results. Arrange frozen pieces in a single layer. Leave space between them for proper air circulation.
Low-Carb and Breading-Free Options
For those watching carbohydrates, simple adjustments work beautifully. Use just seasonings without any coating. The flavor still shines through.
Consider these excellent alternatives:
- Almond flour creates a light, crispy coating
- Crushed pork rinds offer savory crunch
- Simple spice rubs deliver big flavor
These options maintain great taste while reducing carbs significantly. Your family might not even notice the difference!
Adapting the Recipe for Various Dietary Needs
This preparation adapts easily to different dietary requirements. Gluten-free versions use special breadcrumbs or cornmeal. The texture remains wonderfully crispy.
Dairy-free options omit parmesan cheese. Nutritional yeast makes an excellent substitute. It adds similar savory notes without dairy.
For egg-free preparations, use buttermilk or yogurt as binding agents. They help the coating adhere perfectly. The results are equally delicious.
Reduce or eliminate pepper for sensitive taste buds. Adjust cooking time for larger or smaller pieces. The recipe flexes to meet your needs.
| Dietary Need | Simple Substitution | Result |
|---|---|---|
| Gluten-Free | Gluten-free breadcrumbs | Same crispy texture |
| Dairy-Free | Nutritional yeast | Savory flavor maintained |
| Low-Carb | Almond flour coating | Reduced carbohydrates |
| Egg-Free | Buttermilk binder | Perfect coating adhesion |
| Mild Flavor | Reduce spices | Kid-approved taste |
“The beauty of this preparation lies in its incredible flexibility—it adapts to nearly any dietary requirement while maintaining fantastic flavor and texture.”
For those without the appliance, oven instructions work well. Bake at 425°F for 15-18 minutes. Flip halfway through cooking time.
Numerous substitution options accommodate common allergens. The recipe easily adjusts to various restrictions. Everyone can enjoy delicious meals together.
Why This Air Fryer Chicken Tenders Recipe Will Become Your Family Favorite
Picture this: a meal that brings everyone to the table with genuine excitement. This magical kitchen creation transforms ordinary evenings into special family moments. The golden, crispy results create smiles around your dinner table.
You’ll discover numerous reasons why this becomes a weekly tradition. The combination of speed, taste, and nutrition makes it irresistible. Families across America are making this their go-to solution.
The Time-Saving Benefits You’ll Appreciate
Total preparation and cooking time takes just 28 minutes. That’s faster than most delivery services can reach your door. You spend less than half an hour creating restaurant-quality results.
Fifteen minutes of prep work followed by ten minutes of cooking. The remaining three minutes allow for perfect resting. This efficient timeline fits seamlessly into busy schedules.
Compare this to traditional frying methods that require more attention. The appliance does most of the work for you. You gain precious evening hours for family activities instead of kitchen duty.
How This Fits Into Busy Weeknight Routines
Weeknights become stress-free with this reliable solution. Minimal active cooking time means you can multitask effectively. Help with homework while your dinner cooks perfectly.
The simplicity makes it accessible for even beginner cooks. Guaranteed results eliminate dinner anxiety. You’ll feel confident serving this meal any night of the week.
Consider these benefits that transform your routine:
- Faster than ordering takeout or delivery
- Minimal cleanup compared to traditional frying
- Consistent results that please everyone
- Adaptable to various dietary preferences
- Leftovers that reheat beautifully for lunches
Your children will consistently enjoy this meal. Picky eaters become enthusiastic participants at dinner. The familiar yet exciting taste keeps them coming back for more.
“This method transforms family dinners from stressful obligations into joyful gatherings that everyone anticipates.”
The health transformation makes parents feel great about serving it regularly. You provide restaurant-quality taste with home-cooked nutrition. Everyone wins with this balanced approach.
Cost effectiveness becomes another significant advantage. Restaurant quality at home cooking prices saves money over time. The savings add up quickly when you make this regularly.
| Benefit Category | Family Impact | Time Savings |
|---|---|---|
| Preparation Efficiency | Reduced kitchen stress | 15 minutes active time |
| Cooking Simplicity | Consistent results | 10 minutes hands-off |
| Versatility | Multiple meal options | One prep, multiple uses |
| Health Transformation | Better nutrition | No fast-food trips |
| Cost Effectiveness | Budget friendly | No delivery fees |
Skill level requirements remain accessible for all cooking experience levels. The recipe provides guaranteed results every time. You’ll build confidence with each successful preparation.
Family bonding occurs naturally during the cooking process. Children enjoy helping with the simple steps. The activity becomes fun rather than chore-like.
Routine integration happens effortlessly because it solves multiple problems simultaneously. The satisfaction guarantee means it becomes a requested weekly meal. Your family will ask for this preparation regularly.
This truly becomes your new favorite family meal solution. The combination of benefits creates an irresistible package. You’ll wonder how you managed weeknights before discovering this approach.
Conclusion: Your New Go-To Family Meal Solution
Transform your family dinners with this incredible kitchen method. You get crispy, golden results that everyone adores.
Health benefits shine compared to traditional frying. Enjoy 70-80% less fat while keeping amazing taste. Your meals become cleaner and more nutritious.
Save precious time during busy evenings. Preparation takes just 15 minutes with cooking completed quickly. That beats waiting for delivery every time!
Children absolutely love these delicious strips. Customize flavors to match any preference. Dietary needs adapt easily with simple swaps.
Cost savings add up quickly versus takeout. Your homemade version costs significantly less. Quality ingredients ensure superior results.
Make this your weekly tradition starting tonight. Experience the joy of stress-free family meals. Your kitchen becomes the heart of happy memories!